Placemat With Place Setting at a Table for Guests
 14 min read
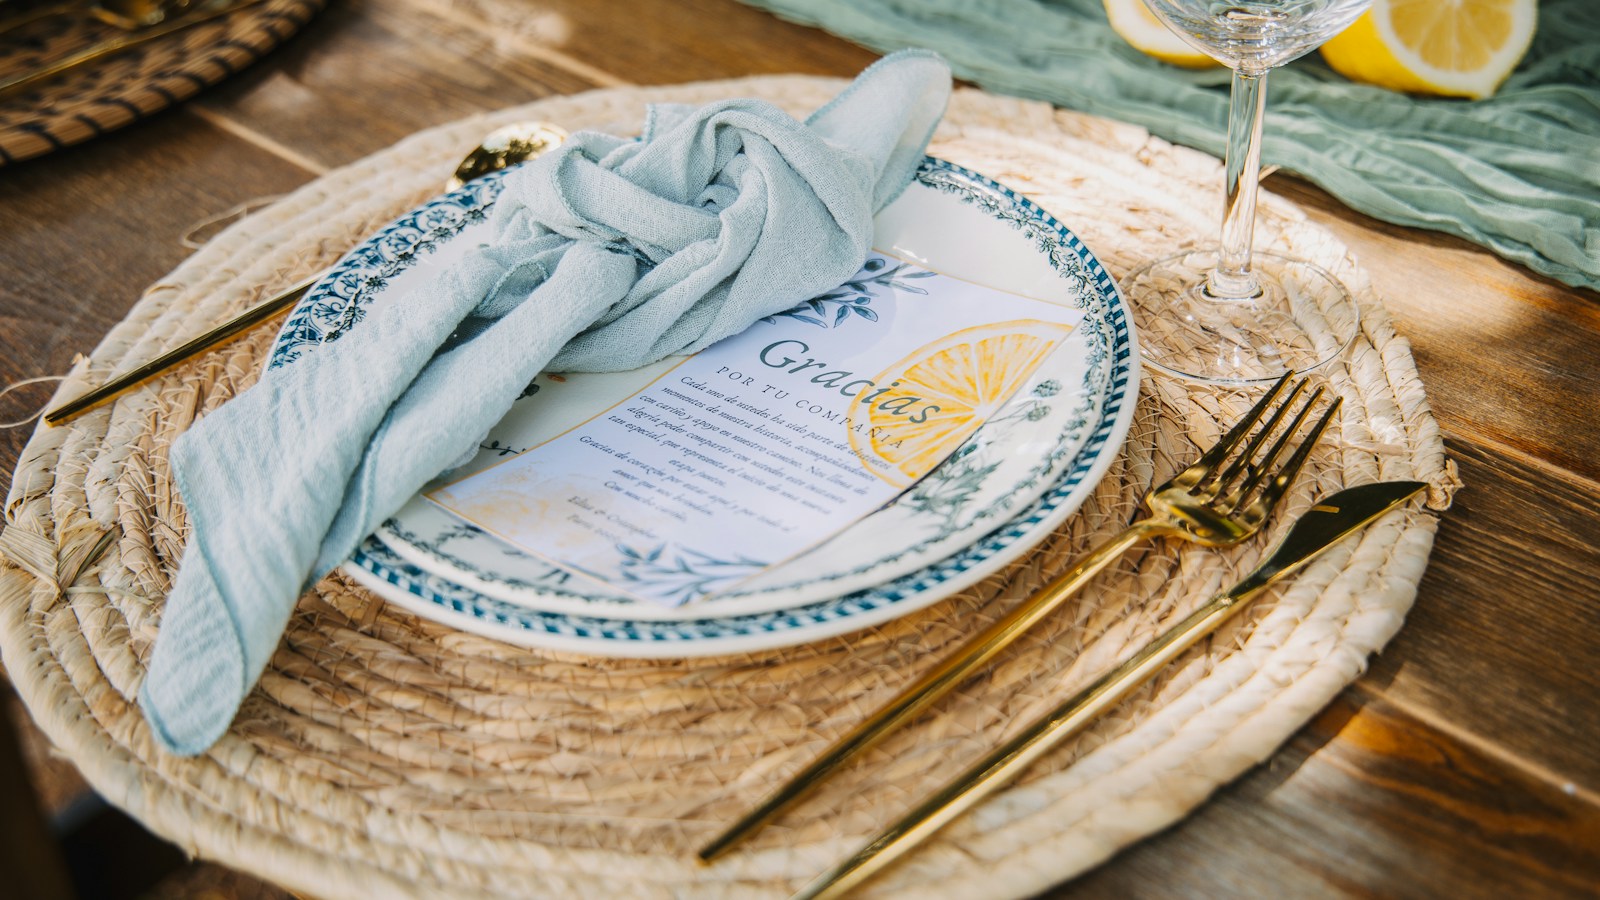
Guided dining surfaces teach independent tableware arrangement through clear visual outlines instead of constant verbal correction.
If water keeps spilling onto the tablecloth, a visual outline can give children another way to learn where cups belong. That nightly frustration reveals what a placemat with place setting outlines actually represents: not a decorative linen, but a piece of educational hardware.
A diagrammed mat shifts the burden of instruction from a parent’s constant reminders to a visual template a child can follow independently. Below, you will find five craftable and printable place setting placemat layouts to trace or sew, sorted by complexity from basic toddler plates to multi-course diagrams. You will also get the exact dimensions required to fit standard dining tables, the fabric choices that survive daily washing, and the construction methods that keep painted stencils crisp so your family can master mealtime routines without a single reminder.
At a Glance
- Standard fabric dining mats require an 18-inch by 14-inch footprint to fit a central dinner plate and flatware comfortably without crowding.
- Montessori-style visual guides use basic outlined shapes for a plate, fork, and cup to help toddlers grasp spatial orientation.
- Semi-formal dining diagrams include a secondary bread plate placed in the top left corner directly above the forks.
- Sewn fabric appliqués need a 3.5-inch diameter circular patch to act as a highly visible cue for beverage glass placement.
- Cardstock stencils paired with fabric spray paint create durable utensil outlines that withstand repeated trips through a hot laundry cycle.
Why Do Children Struggle With Table Setup?
Young helpers frequently guess where flatware and cups belong because daily dinner routines move too rapidly for them to memorize spatial alignment through observation alone. A placemat with place setting outlines provides a permanent visual map on the table, turning an abstract list of etiquette rules into an intuitive matching exercise. You will receive precise template configurations, standard sizing guidelines, and construction methods for these educational mats to help your family transition from messy trial and error to confident meal preparation.
Understanding the Educational Purpose of a Guided Table Layout
A diagrammed mat teaches spatial awareness by showing exactly where dining tools sit during a meal. This tactile approach shifts learning from spoken rules to visual matching, accelerating a child’s grasp of table manners.
The primary goal of a place setting placemat is behavioral reinforcement over aesthetic appeal.
When children see an outline for a fork on the left and a knife on the right, they correct placement mistakes before the meal begins.
This builds confidence. A visual guide replaces the need for a parent to intervene during the busy final minutes before serving dinner.
Every correct place setting relies on proportional spacing. Locking utensils into fixed coordinates on a grid prevents plates from drifting into neighboring seats. Expect fewer elbow bumps and knocked-over glasses when every item has an anchored home base.
Knowing how to set a place setting becomes an automatic reflex.
These templates adapt well to adult gatherings. Providing a subtle, mapped layout during casual dinner parties removes guest confusion over which water glass belongs to whom. This organizational detail aligns with other non-verbal table manners for hosts that set the tone for a relaxed evening.
- Visual outlines encourage toddlers to take ownership of their daily dinner routines and foster independent learning.
- Printed borders enforce accurate spacing by keeping centerpieces and plates from encroaching on a guest’s eating area.
- Clearly marked circles for beverage glasses reduce errors by drastically lowering the chances of accidental spills.
- Adaptable layout designs scale easily from simple three-piece toddler setups to complex multi-course arrangements.
Applying this visual framework to a formal holiday dinner requires adjusting these boundaries to fit multiple wine stems and soup spoons.
|
Hosting Tip: Measure Flatware Before Cutting Fabric Bases |
Securing Accurate Dimensions When Crafting Standard Fabric Mats
A successful fabric template requires 18 inches of horizontal space and 14 inches of vertical space to support standard dinnerware. Cutting a mat any smaller forces the silverware to hang awkwardly off the edges.
Securing the right dimensions prevents the frustration of a cramped eating surface. If you plan to design your own washable layout, adhere to these guidelines:
- Finished proportions: According to AppleGreen Cottage, standard rectangular fabric placemats measure exactly 18 inches wide by 14 inches tall (45 by 35 cm). This standardized size ensures the finished piece aligns flush with the table edge while leaving room for a large central dish.
- Seam allowances: Hello Creative Me notes that sewing a finished 14 by 18-inch mat requires initially cutting the fabric to 15 by 19 inches to allow a half-inch seam on each edge. Skipping this calculation results in a shrunken border that cannot accommodate a full utensil set.
- Metric dimensions: A generous footprint keeps the dining experience comfortable. French Knot confirms that a rectangular mat measuring 33 by 45 cm provides optimal dimensions to hold a central plate and flatware gracefully.
Sticking to these precise measurements guarantees your educational templates transition smoothly into standard dining rotations.
| Mat Style Target | Initial Cut Width | Initial Cut Height | Finished Width | Finished Height |
|---|---|---|---|---|
| Toddler Canvas | 17 inches | 13 inches | 16 inches | 12 inches |
| Standard Casual | 19 inches | 15 inches | 18 inches | 14 inches |
| Semi-Formal Cloth | 21 inches | 16 inches | 20 inches | 15 inches |
| Circular Charger | 16 inches (diameter) | 16 inches (diameter) | 15 inches | 15 inches |
Accommodating Extra Utensils on Semi-Formal Diagram Printables
Semi-formal layouts require additional visual markers for bread plates and secondary forks. Mapping these multi-course items onto a printable grid prepares families for holiday dinners and formal occasions.
When deciding how to set a place setting for a three-course menu, the spatial requirements change dramatically from a standard weeknight dinner. A larger mat must clearly designate zones for specialized dishes. Arte Italica explains that in a semi-formal layout, the dinner plate remains centered, the salad plate goes to the left, and the bread and butter plate sits above the forks.
Standardizing the Grid Proportions
To help you standardize these arrangements, here are five distinct template configurations you can trace directly onto fabric or print onto 11×17 ledger paper. These layouts teach anyone how to position tableware precisely.
- Draw a 9-inch circle in the lower center for a basic toddler template plate. Add a 1.5-inch wide rectangle to the left for a single fork and a 3-inch circle to the top right for a spill-proof cup.
- Center a 10.5-inch plate outline for the everyday casual template. Trace a salad and dinner fork 1 inch left, a knife 1 inch right, and a 3.5-inch water glass circle 2 inches above the knife.
- Build the multi-course template by adding a 6-inch circular outline in the top left corner for a bread plate. WebstaurantStore confirms placing bread plates top-left and arranging flatware outside-in meets standard layout rules.
- Draw a small fork pointing right and a small spoon pointing left above the dinner plate outline for the dessert-ready template. This trains hosts on how to host a dinner party your friends will love by separating dessert utensils.
- Center a 10-inch plate outline to create the chopstick template. Place a 1-inch by 3-inch horizontal rectangle directly below the plate to indicate a chopstick rest, maintaining proper alignment for the layout.
Once these initial outlines are verified on paper, applying the patterns to washable fabrics requires calculating the proper seam allowances.
Engaging Young Children Without Overcomplicating Montessori Templates
Toddlers learn fastest when presented with minimal, highly recognizable shapes. A Montessori-style layout reduces visual clutter by stripping away decorative patterns in favor of bold, solid outlines.
An effective table setting guide for a three-year-old looks vastly different from an adult etiquette chart. The Art Kit offers printable Montessori-style templates specifically designed to teach kids proper tableware arrangement through clean, distraction-free geometry. By highlighting only the essential tools, children process the layout as an engaging puzzle.
Focusing on the bare minimum guarantees early success. The Emily Post Institute provides a similar printable diagram featuring simple outline drawings of a plate, napkin, cup, and utensils to instill foundational table setting habits. A child simply places their physical cup over the printed circle, creating an immediate sense of accomplishment.
You can also use the surface to reinforce mealtime habits. The Moments A Day printable guide combines visual utensil diagrams with written mealtime behavioral cues for young children, offering a gentle reminder to say please and thank you.
Structuring a Child-Friendly Layout
Keep the spacing generous and the outlines bold when designing for small hands. Childhood 101 demonstrates that a printable instructional mat featuring drawn guides for tableware placement assists children with setting dinner tables entirely independently.
- Fill the traced fork and knife shapes with a solid color rather than a thin outline so toddlers can easily identify the item.
- Stick to one fork, one spoon, and one plate for children under four.
- Paint the drink circle blue and the flatware rectangles yellow to build strong mental associations.
Moving from these basic geometric cues to a standard family dinner setup requires adding slightly more complex glassware arrangements.
|
Gather DIY Materials Effortlessly |
Preventing Fabric Distortion When Sewing Appliqué Alignment Markers
Sewing thick fabric patches onto a flexible mat often causes the edges to pucker and shift out of place. Using stabilizing interfacing behind the fabric prevents the design from bunching up under the needle while you work.
Creating a custom correct place setting layout through appliqué yields a textured result, but the technique demands precision. The Inspired Wren tutorial solves visual cueing by applying a 3.5-inch fabric appliqué as a glass marker and a color-blocked left strip to indicate napkin placement. This layered fabric approach creates a durable, tactile map.
Keep the fabric flat during construction by applying three distinct methods:
- Select a heavyweight base: pinning the shapes firmly to sturdy materials like denim or canvas rather than a thin sheet.
- Avoid lightweight cotton because thin fabrics pull and distort when a sewing machine traces the tight curves of a spoon or a cup circle.
- Apply iron-on adhesive to lock the shapes flat against the background before stitching to maintain the correct placement.
This tactile construction method also accommodates diverse cultural dining setups. You can easily modify the appliqué patterns to sew small rectangular patches for soup spoons, aligning your family’s daily habits with Chinese dining etiquette routines. That flexibility lets the mat adapt to whatever menu you serve regularly, preparing the table for the next specialized flatware arrangement.
Maintaining Clarity When Tracing Stencils for Washable Designs
Painted outlines often bleed into the fabric fibers, creating messy silhouettes. Using crisp cardstock stencils and a dry-brushing technique keeps the utensil shapes perfectly sharp.
For a washable diagrammed mat, fabric paint beats standard markers. I Can Teach My Child details a brilliant method of photocopying actual eating utensils onto paper to cut highly accurate, true-to-size stencils. This ensures the physical forks your family uses match the painted outlines precisely.
A sharp edge requires the right application tool.
Hydrangea Hippo recommends cutting custom cardstock stencils with an electronic machine and using fabric spray paint to apply outlines directly onto the canvas. Spray paint applies an even, thin coat that dries quickly without soaking completely through the weave.
Always heat-set the painted place setting on table fabrics before their first wash. Running a hot iron over the dried paint bonds the pigment to the fibers, preventing the knife and fork shapes from fading into unrecognizable gray smudges. This durability ensures your family can rely on the mats for months, much like referring to a reliable dinner party seating chart before guests arrive.
- Pre-wash the canvas: Remove sizing chemicals from the fabric before painting so the pigment adheres properly.
- Use stencil adhesive: Spray the back of your cardstock cutouts with temporary adhesive to prevent paint from seeping underneath the edges.
- Dab, do not smear: If using liquid paint, apply it with an up-and-down pouncing motion rather than brushing side to side.
- Heat-set thoroughly: Press a dry iron over the finished, dried design for three to five minutes to lock the color permanently.
Securing these painted outlines leads directly into selecting a heavy canvas weave that resists fraying under daily wear.
How an Educational Mat Differs From a Traditional Blank Linen
A blank dining mat exists to protect the table from heat and spills while adding color to the room. An educational place setting at table surface functions actively as a daily instruction manual.
Traditional linens rely entirely on the host’s existing knowledge of where items belong. When you place a blank rectangle down, you must still mentally calculate several details:
- The spacing for the plate.
- The alignment of the blade.
- The distance to the water glass.
A diagrammed place setting table tool removes that mental friction completely by making the invisible etiquette grid visible.
This functional design transforms a daily routine into an interactive system. Rather than telling a child their spoon is in the wrong spot, the empty printed spoon outline delivers the feedback instantly. It builds a foundation of spatial respect that mirrors the intentionality found in Italian dining etiquette traditions, where every item on the table serves a distinct purpose.
|
Coordinate Family Dinner Routines |
Printing Your First Template to Simplify Daily Table Routines
Your family’s nightly dinner setup shifts from a confusing lecture to a quiet routine the moment you introduce a visual grid. Choose the basic toddler layout to start, print it onto heavy cardstock, and let your youngest helper match their cup and spoon to the shapes tonight.
A place setting thrives on consistency. Once your household masters the initial configuration, expand the table lessons using distinct physical guides:
- Heavy cardstock: Keep the basic toddler layout available for daily meals to reinforce cup and spoon placement.
- Painted canvas mat: Introduce this upgraded layer to teach the proper position for a salad fork or a bread plate.
- Shape matching: Let the visual outlines provide immediate feedback rather than relying on spoken instructions.
This step-by-step visual training builds a capable host who understands exactly how to organize elements for any occasion, connecting a simple Tuesday dinner to an elegant French dining experience.
Frequently Asked Questions
How wide should an educational fabric dining mat be?
An educational fabric dining mat should measure 18 inches wide to adequately support a central plate and standard flatware. This width ensures utensils do not crowd the edges while leaving sufficient room for a beverage glass above the knife. Standard patterns frequently recommend this dimension to perfectly match standard dining table proportions.
What material works best for a washable diagrammed surface?
Medium-weight cotton canvas works best for a washable diagrammed surface because it holds printed stencils firmly without warping in the laundry. A sturdy fabric resists wrinkling, ensuring that the painted outlines for forks and plates remain clearly visible after daily use.
When do children typically master independent table arrangement?
Children typically master independent table arrangement around age six when guided by a clear visual template. Younger toddlers can begin matching cups and spoons to printed outlines as early as age three, gradually internalizing the layout through consistent daily practice.
Can I use fabric markers to draw permanent utensil outlines?
Fabric markers successfully create permanent utensil outlines on light-colored materials if you heat-set the ink with a hot iron before the first wash. Drawing thick, solid lines prevents the shapes from fading into unrecognizable smudges over months of continuous cleaning.
Should a water glass sit above the knife or the forks?
A water glass properly sits above the knife on the right side of the dining layout. Providing a distinct printed circle for this specific glass prevents accidental spills and trains young hosts to keep the dominant reaching path completely clear of fragile stemware.
Why does a semi-formal layout require multiple beverage glasses?
A semi-formal layout requires multiple beverage glasses to support different drink pairings served throughout a multi-course menu. A standard configuration places the primary water goblet directly above the knife, with a secondary wine or juice glass positioned slightly lower and to the right.
Continue Reading:
More On Tablescape:
- Tablescape Ideas for the Thanksgiving Dinner Host
- 15 Christmas Tablescape Decor for Dining Tables
- 10 Place Setting Card Template Ideas for Your Event
- 7 Dining Table Centerpiece Ideas for Everyday Decor
- Best Floral Centerpiece for Dining Table Room Decor
More from The Gourmet Host:
- Place Setting Rules Every Dinner Party Host Needs
- Table Manners for Hosts: 9 Cues That Set the Tone
- How to Host a Dinner Party Your Friends Will Love
- Chinese Dining Etiquette: The Host’s Table Guide
- Dinner Party Seating: 6 Rules for the Host’s Chart
- Italian Dining Etiquette: The Host’s Table Guide
- French Dining Etiquette: A Host’s Continental Primer
Explore TGH Categories:
- Set the Scene
- Drinks and Bar
- Plan the Meal
- Engage with Guests
- Games and Toasts
- Tools and Techniques
- Why We Gather