Charcuterie Board Platter Setup: A 12-Minute Plate
Pick the platter before the food, and the rest of the build solves itself. Most home hosts shop the cheese and meat first, then hunt for a board big enough to hold what landed on the kitchen counter. That sequence runs backwards. A 12-inch round serves four guests; a 20-inch rectangle handles twelve. The surface and shape decide how much cured meat goes in the cart, how many bowls fit around the rim, and whether the herb sprigs read as garnish or filler.
Flip the order and the shopping becomes a sizing exercise instead of a guessing game. Board first, food second, garnish last. Which surface (wood, marble, slate, bamboo) suits which kind of dinner comes next, and a sizing chart pairs every board diameter to a working guest count.
At a Glance
- Pick the platter before the food. Surface and size dictate the build, not the other way around.
- Sizing chart by guest count: 12-inch round for 4, 15-inch round or 18-inch oval for 6 to 8, 20-inch rectangle or 24-inch oval for 12 to 16.
- Material trade-offs: wood absorbs cheese juices, marble stays cold, slate looks dramatic but stains, bamboo is light and budget-friendly.
- Plating sequence runs in five steps and finishes inside 12 minutes.
- Three height levels (flat cheese, rolled meat, raised bowls) plus negative space carry the visual weight of the spread.
What Is a Charcuterie Board Platter?
A charcuterie board platter is the serving surface (wood slab, marble slab, slate tile, ceramic tray, or bamboo paddle) that holds a spread of cured meats, cheeses, and accompaniments at a dinner party or cocktail hour. The platter defines the visual frame: shape, size, edge depth, and color underneath the food. A 12-inch round wood charcuterie board fits four guests comfortably; a 24-inch oval marble platter scales to sixteen. Hosts use the words board, platter, and tray interchangeably in conversation, though purists reserve charcuterie tray for shallow metal or ceramic trays and reserve charcuterie board for the wood and stone slabs that anchor the spread.
Why the Platter Comes Before the Food
Surface shape, size, and material dictate the build. A 10-inch wood round serves four guests with three cheeses and two meats. A 24-inch marble rectangle holds the same proportions scaled to twenty. Shopping the food first and hoping a platter fits the haul is the most common mistake in a charcuterie board platter setup.
Working from the platter outward solves three host problems at once: quantity, layout, and budget. Surface area sets a ceiling on quantity. Shape (round, oval, rectangle) determines where cheese goes and where bowls fit. A clear surface count means the cart never holds twice the cured meat needed for the night.
- Round boards: best for intimate spreads of four to eight; place three or four cheese points evenly across the surface.
- Oval boards: the all-purpose shape; fits six to twelve guests and reads more dinner-party than rectangular.
- Rectangular boards: scale up cleanly; run separate cheese, meat, and accompaniment zones for parties of twelve and above.
For a sense of how a finished spread reads at scale, Ina Garten’s Barefoot Contessa charcuterie platter shows the proportions on a long wooden board built for sixteen. The next decision is the surface material itself.
|
Plan Your Charcuterie Platter in the TGH App |
Board Material: Wood, Marble, Slate, or Bamboo
Material choice shapes how the spread reads and how the board behaves over the evening. The four common surfaces (wood, marble, slate, bamboo) each have a clear use case.
Wood and bamboo for everyday boards
Wood absorbs cheese juices and protects against knife marks. A wood charcuterie board reads warm and traditional. An end-grain or olive-wood slab will outlast a generation of dinner parties if oiled twice a year. Bamboo is light, budget-friendly, and food-safe with proper sealing.
Marble and slate for cold and dramatic
Marble stays cold longer than any other surface. That makes a marble charcuterie board the right pick for hot rooms, summer cocktail hours, and soft cheeses that lose shape above 70 degrees. Slate looks dramatic and contrasts beautifully against bright fruit and pale cheese. The trade-off: slate stains where wet items sit, and the surface dulls knives faster than wood or marble.
- Wood (oak, walnut, olive, end-grain): the traditional pick. Absorbs juices, oils up well. Cross-reference TGH’s cutting boards guide for material trade-offs that carry over to serving boards.
- Marble: stays cold, photographs cleanly, holds soft cheese shape. Heavier than wood, so set the platter in place before loading it up.
- Slate: dramatic and modern, but stains and dulls knives. Pre-cut hard cheeses; reserve slate for evening cocktail hours.
- Bamboo: light, food-safe, budget-friendly. The pick for hosts running this format often.
Serious Eats reviewed twelve charcuterie boards; the Serious Eats best charcuterie boards roundup breaks down which materials hold up under repeated use. Once material is locked in, size is the next decision.
Board Size and Guest Count: A Sizing Chart
Sizing the board to the guest count is the simplest math in a charcuterie board platter setup. Working rule: two ounces of cheese and two ounces of cured meat per guest for an appetizer board, plus roughly 25 to 30 square inches of platter surface per guest.
- 4 guests: 12-inch round or 14-by-8-inch paddle. Two cheeses, two meats, three small bowls, one fruit cluster.
- 6 to 8 guests: 15-inch round, 18-inch oval, or 16-by-12-inch rectangle. Three cheeses, three meats, four to five bowls.
- 10 to 12 guests: 18-inch round, 20-inch oval, or 20-by-14-inch rectangle. Four cheeses, three meats, six bowls, multiple fruit clusters.
- 12 to 16 guests: 20 or 24-inch rectangle, or two coordinating boards. Four to five cheeses, four meats, six to eight bowls.
- 16+ guests: use two boards rather than one oversized platter. A 30-inch board crowds the rest of the food.
Pairing board size to guest count keeps the table reading balanced. TGH’s centrepiece ideas guide for the dining room table covers the wider table-composition logic. The board is now ready to load.
The 12-Minute Plating Sequence
Plating a charcuterie platter follows a fixed five-step order that runs in roughly 12 minutes from empty board to finished spread. The order matters: cheese anchors the layout because it doesn’t move once placed, and herbs go last because they wilt the moment they touch a cold board. Working in this sequence prevents the most common plating mistake of filling space at random.
Steps one through five, in order
- Cheese first, in three or four points: Place wedges or whole rounds at evenly spaced points across the board. On a round board, picture a triangle or a four-point star. On a rectangle, run cheese down the long axis at thirds.
- Cured meat second, folded into the gaps: Fold prosciutto into loose ribbons, fan salami in rows, and roll soppressata into rosettes. The meat fills the negative space between the cheese points.
- Wet items third, in small bowls: Bowls of fig jam, honey, mustard, olives, or cornichons go in at uneven heights. Wet items never sit directly on the board; the moisture wrecks the surface and the visual.
- Dry accompaniments fourth: Marcona almonds, dried apricots, breadsticks, and any remaining nuts or dry fruit fill the smaller gaps that the bowls left open.
- Fresh fruit and herbs last: Grapes in small clusters, sliced figs, berries, and rosemary or thyme sprigs go on in the final two minutes. These are the freshness signal and the color punctuation.
Salami and prosciutto folds that finish the look
Curated Spread documented a step-by-step salami folding routine for hosts who want the meat to read finished rather than dumped; the Curated Spread guide on how to fold salami for a charcuterie board shows the rosette and fan folds that carry the visual weight on a 15-inch round or larger. Supermarket Italy’s roundup of 10 prosciutto setups covers the prosciutto-specific moves (ribbons, draped roses, fan folds) that finish the meat course on the board. With the sequence locked, the next layer is the visual logic that separates a balanced platter from a flat one.
|
Hosting Insight: Stage the Board Cold, Serve It Warm |
Height Variation and Negative Space
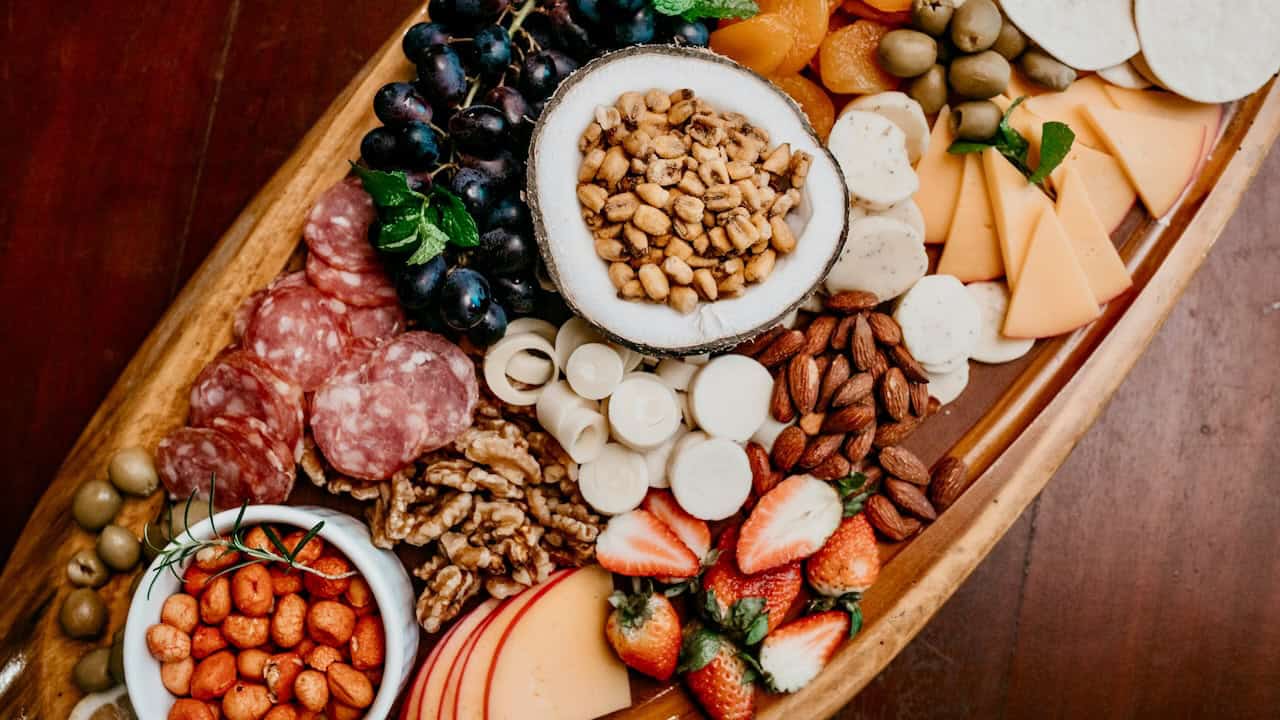
Height variation is what separates a flat spread from a finished one. Aim for three visible height levels: flat cheese wedges on the board surface, folded or rolled cured meat at medium height, and small bowls or ramekins (one to two inches tall) at the highest level. A fourth level emerges when breadsticks lean against the rim.
Negative space is the second half of the rule. Filling every gap ends up reading cluttered no matter how good the ingredients are. Leave two or three deliberate empty patches across the board, roughly the size of a deck of cards each. These pockets give the eye a place to rest.
- Level 1 (flat): cheese wedges, sliced baguette, and fanned salami sit flush on the board.
- Level 2 (medium): rolled prosciutto rosettes, soppressata folds, and small piles of nuts add half-inch lift.
- Level 3 (raised): ramekins of jam, honey, mustard, and olives at one to two inches tall.
- Level 4 (diagonal): breadsticks or grissini leaned against the board rim break the flat plane.
Foxes Love Lemons published a roundup of layered plating moves; the Foxes Love Lemons unique charcuterie board ideas roundup shows the rule applied across themes from rustic to modern. The eye work is half the platter; color is the other half.
Color Composition: Where to Place the Bright Items
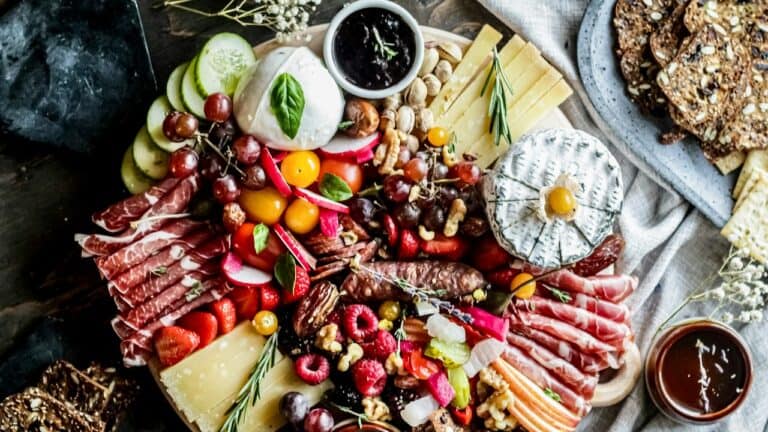
Color carries the platter from technically correct to visually finished. Working rule: three points of bright color spaced evenly around the board, never bunched together. Strawberries, figs, pomegranate seeds, persimmon slices, or red grapes all read as bright color against the cream-and-cured-meat palette.
Placement matters as much as quantity. Bright items go opposite the rim from each other so the eye travels across the platter rather than landing in one spot. On a round board, picture a triangle of color points. On an oval or rectangle, three points spaced down the long axis carry the same logic.
- Pick three bright items, not five. Two berries plus pomegranate. Strawberries plus figs plus blackberries. Anything beyond three reads cluttered.
- Space color points evenly across the platter, not clustered in one corner.
- Sit the brightest items closest to the board rim so they read against the tablecloth, not against the cheese.
Bon Appetit ran a seasonal walk-through on a Thanksgiving board; the Bon Appetit Thanksgiving charcuterie board ideas article shows pomegranate, persimmon, and dried apricot as the three color points across a 20-inch rectangle. Design Improvised’s Super Bowl charcuterie board ideas roundup covers themed color composition for a casual spread. Garnish is the quiet finishing move that follows.
Garnish That Adds Without Distracting
Garnish is the finish, not the focus. Rosemary sprigs run along the rim, thyme tucks under cheese wedges, and edible flowers add a summer touch in season. Garnish should read as a frame around the food, never as a layer on top.
- Rosemary sprigs: two or three along one edge of the board. Strip the lower leaves so the woody stem sits flat.
- Thyme sprigs: tuck under or beside cheese wedges. The small leaves don’t compete with the cheese visually.
- Edible flowers: use sparingly in summer. Two or three blossoms total. Verify they’re food-safe before plating.
- Citrus zest curls: a half-strip of orange or lemon zest near soft cheese signals the pairing.
Shelburne Farms frames garnish as part of cheese pairing rather than decoration; the Shelburne Farms guide on how to create a cheese board walks through which herbs pair with which cheeses. TGH’s elegant floral arrangements for the dining table covers how the platter garnish should echo the floral arrangement at the table center. The most common plating mistakes follow.
Common Plating Mistakes Hosts Make
Five plating mistakes account for almost every charcuterie platter that looks off at the table. Each has a 60-second fix, most can be corrected before the first guest arrives.
- Cheese piled in one corner. Lift two of the cheese pieces and redistribute to opposite points on the board. Cheese should anchor the layout in three or four places, not stack at one end.
- Cured meat in a pile. Fold the prosciutto and salami into ribbons or rosettes. A pile of meat reads as raw deli; folded meat reads as intentional charcuterie presentation.
- Crackers stacked on the board. Move them to a basket or shallow bowl alongside. Crackers on the board itself get crushed under the wet items, and they crowd the visual weight.
- No height variation. Add two small ramekins of jam or honey to lift the eye off the flat surface. Even one bowl of olives at two inches tall changes the read entirely.
- Every gap filled. Pull two or three handfuls of garnish out and leave the negative space. A platter with breathing room reads more sophisticated than a fully packed one.
Taste of Home compiled a gallery of plating fixes alongside finished examples; the Taste of Home charcuterie board ideas collection shows the before-and-after of repositioning cheese and folding meat. Catching these five mistakes early is the difference between a platter that holds the table and one that fades into background.
|
Subscribe to Dinner Notes |
How to Style a Charcuterie Platter for Photos
Even hosts who never post a photo should style the platter as if they might, since photo-grade composition reads as well in person. Three rules carry the work: top-down or 15-degree angled light, a low-contrast surface underneath, and a three-second eye test before guests arrive.
- Top-down light: natural window light or a soft overhead lamp, not direct sun. Top-down framing flattens height variation slightly, which makes bowls and cheese points pop.
- Angled at 15 degrees: tilt the camera so height variation reads. A perfectly square top-down shot loses the medium and raised levels.
- Low-contrast surface: a linen runner, raw wood table, or unbleached napkin underneath. White marble fights the cheese; black slate makes colors disappear.
- Three-second eye test: stand back and count three seconds. If a single zone draws the eye and holds it, fix that zone before guests arrive.
Hosts running this format often will benefit from TGH’s table-setting ideas guide for dinner parties for context on how the platter sits inside the full table composition. TGH’s pro-stress-free dinner table setting guide covers placement relative to plates, napkins, and centerpieces.
My Life on Kaydeross Creek published a roundup of 27 charcuterie board ideas that all photograph well; the Kaydeross Creek 27 epic charcuterie board ideas roundup shows the photo-grade composition rules applied across themes. The platter is the visual anchor of the cocktail hour, and built right, it sets the tone for everything that follows.
Frequently Asked Questions
A charcuterie board is the food itself, the spread of cheese, meat, and accompaniments. A platter is the serving surface that holds it. The board can be wood, marble, slate, or ceramic; the spread is what makes it charcuterie. The two words are used interchangeably in most contexts.
Size to your guest count: a 12-inch round serves 4, a 15-inch round or 18-inch oval serves 6 to 8, and a 20-inch rectangle serves 12 to 16. For larger groups, use two coordinating boards rather than one oversized platter that overwhelms the table.
Wood is the most versatile because it absorbs cheese juices and protects against knife marks. Marble stays cold longer, ideal for warm rooms. Slate looks dramatic but stains easily and dulls knives. Bamboo is light, budget-friendly, and food-safe with proper sealing.
Place cheese first in three or four points across the board, then fold cured meat into the space between them. Add bowls of wet accompaniments (jam, olives, mustard) at uneven heights. Fill remaining gaps with nuts and dry fruit, then finish with fresh herbs and sliced baguette.
Aim for three height levels: flat cheese wedges on the board surface, folded or rolled meat at medium height, and small ramekins or bowls (one to two inches tall) at the highest level. Leaning breadsticks against the rim adds a fourth level without crowding.
Pre-cut hard and semi-firm cheeses into wedges or batons so guests don’t have to wield a knife at the board. Leave soft cheeses (brie, camembert) whole with a small knife alongside. Aged blue cheese can be crumbled or sliced depending on the rest of the spread.
Continue reading…
More On Charcuterie Boards
- How to Build a Charcuterie Board (Host’s Step-by-Step)
- Charcuterie Board Ingredients (Everything to Include)
- Breakfast Charcuterie Board (Brunch Hosting Guide)
More from The Gourmet Host
- 7 Creative Table Setting Ideas for Your Next Dinner Party
- Centrepiece Ideas for Every Dining Room Table
- How to Set a Dinner Table Like a Pro Without the Stress
- Knife Skills for Hosts: 5 Cuts That Look Like a Pro
- Elegant Floral Arrangements for Your Dining Table
Explore TGH Categories