How to Lay a Placemat With Place Setting: A Host’s Playbook
 12 min read
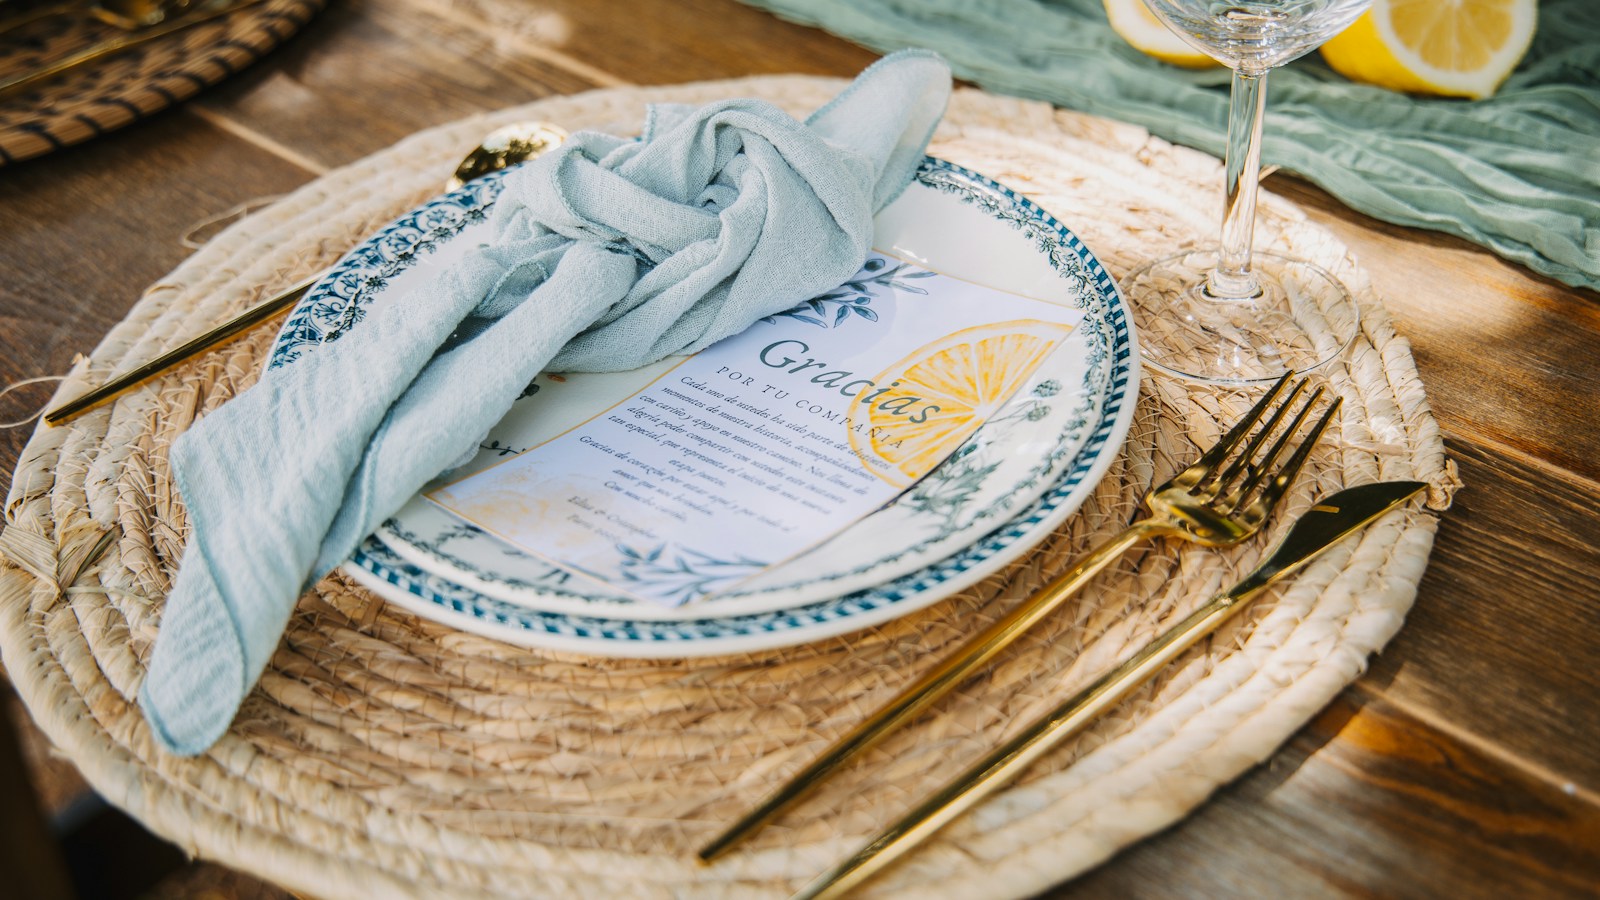
Planning your next gathering involves designing a beautiful placemat with place setting for every person attending. Creating an inviting table layout gives attendees a comfortable physical space to sit, eat, and converse together.
This guide covers the exact timeline for designing your table from two weeks out to the day of your dinner. You will learn how to choose foundation linens, map out required utensils, and time your physical preparation for a smooth dining event.
At a Glance
- Select your foundation materials two weeks before your dinner party to establish a clear aesthetic direction.
- Let your finalized food menu dictate the exact plates and flatware needed on the dining table.
- Polish and position stemmed glasses three days out to ensure a clear, sparkling layout.
- Place dining utensils in the order of use from the outside working directly inward.
What a “placemat with place setting” means for home hosts
A placemat with place setting refers to the complete physical arrangement of a single diner’s assigned seat at your table. This precise arrangement includes the protective base mat, dinnerware, flatware, drinking glasses, and fabric napkins required for the planned meal. Home hosts use this foundation to protect the underlying table surface while organizing the specific eating tools needed for dining.
This setup applies whenever you host a structured sit-down meal for family or friends. The placemat defines the physical boundaries for one guest.
The difference between a place setting and a buffet spread is that a place setting caters entirely to the individual diner rather than the entire group. Mastering a Tablescape: The Full Table Setting And Decor Guide starts with understanding these individual boundaries.
Select the Foundation for Your Placemat With Place Setting (2 Weeks Out)
Selecting the right placemat with place setting starts two weeks before your dinner party. The placemat serves as the visual anchor for your table, protecting the surface while framing the meal. Match the material, like woven rattan or crisp linen, to the formality of your planned gathering.
When shopping for a new base layer, look closely at the product details rather than relying on the front cover of the box.
The Canadian packaging guide gives an example of a four-placemat package illustrated with six mats that may mislead without a qualification. Check the stated contents rather than assuming everything pictured is included, and count enough mats for your seats.
Choose a foundation that fits your table:
- Match the tone: Your base layer helps set the tone: ribbed cotton suggests a relaxed supper, while a structured metallic weave can suit formal holiday dining. Choose the material for the gathering you want to host.
- Check the mat shape: Take time to match the shape of the mat to your table. Rectangular mats fit beautifully on rectangular tables, while wedge-shaped mats prevent corners from overlapping on a round table.
- Choose a contrast: Actionable step: Choose a placemat texture and color that contrasts slightly with your dining table’s surface to make the individual place settings visually pop.
You can read more about selecting complementary table colors in our guide on centrepiece ideas for the dining table.
|
Match the setting to dinner |
Build the Menu to Dictate Tableware (1 Week Out)
Your menu entirely dictates the plates, bowls, and silverware required for your placemat with place setting. By planning the courses one week ahead, you ensure you have the correct tableware for every guest without crowding the placemat with unnecessary and confusing utensils.
Every single dish you plan to serve requires specific eating equipment. A hot soup course demands a deep bowl and a rounded spoon, while a roasted steak main requires a sharp, serrated knife. Outline your exact recipes early so you know exactly which physical pieces must sit on the table.
| Course Type | Primary Dishware Needed | Flatware Required | Optimal Table Placement |
|---|---|---|---|
| Appetizer Salad | 7-inch ceramic plate | Standard salad fork | Left side, outside slot |
| Hot Soup | Wide-rimmed bowl | Rounded bouillon spoon | Right side, outside slot |
| Steak Main | 10-inch dinner plate | Serrated meat knife | Right side, inside slot |
Consider the degree of personalization your menu requires across different diners. In traditional Japanese tableware arrangements, the rice bowl (ochawan) functions as a highly personalized component, with each family member using an individualized style. You can adopt a similar approach by mixing plate colors or offering specific bowl shapes for attendees with different dietary needs.
Actionable step: Finalize your recipes in The Gourmet Host app, then make a separate checklist of the serving dishes, bowls and plates each course needs.
Mapping out these requirements early is crucial for creating the Christmas tablescape playbook.
Plan the Wine and Glassware Placements (3 Days Out)
Proper glassware is crucial for a complete placemat with place setting. Three days before the event, polish your wine and water glasses. Arranging the right stemmed glasses not only looks elegant but practically enhances the drinking experience for your guests throughout the entire meal.
Handling drinking glasses requires deliberate care to maintain their clear, flawless appearance. Stemmed glassware is engineered specifically to prevent body heat from warming chilled wine and to keep fingerprints off the bowl. By washing and polishing your stems early, you avoid rushing on the afternoon of the party.
Use a mixture of hot water and white vinegar to eliminate hard water spots, then dry them immediately with a microfiber cloth.
If you plan to serve multiple beverage pairings, you must map out the spacing on your table carefully. A standard 8.5 x 11-inch wine tasting placemat template accommodates four wine tasting spots alongside evaluation charts. Keep this specific spatial requirement in mind if your menu includes a unique beverage pairing for every single course.
Actionable step: Set out your stemmed glassware early to inspect for water spots, polishing them gently with a microfiber cloth before they hit the dining table.
To learn more about organizing multiple glasses, review our dining table etiquette and place setting rules.
|
Hosting Tip: start with the menu. |
Arrange Utensils and Plates on the Placemat (1 Day Out)
One day before hosting, physically lay out your placemat with place setting. Centering the main dinner plate on the placemat leaves necessary room for flatware and glasses. Setting the table early removes day-of rushing and allows you to double-check that every guest has the right tools.
Positioning your forks, knives, and spoons correctly makes dining comfortable for everyone seated.
Arrange the setting in a clear sequence:
- Follow course order: The fundamental etiquette rule for table settings is that utensils are placed in the order of use from the outside working inward. This logical placement naturally guides your friends smoothly through each successive course.
- Position the water: Next, arrange the beverage stations for each individual seat. In a basic table setting, the water glass is positioned above the knife or at a 45-degree angle to its right. Consistency across every single seat creates a beautiful, balanced aesthetic for your dining room.
- Lay out flatware: Actionable step: Lay your forks on the left and knives on the right, ensuring the water glass sits perfectly above the knife in the top right corner.
For a detailed breakdown of flatware spacing, read dining table etiquette and place setting rules.
Set Out Personalized Elements and Kids Spots (Day Of, Morning)
Personal touches transform your placemat with place setting from standard to spectacular. On the morning of your gathering, add individual name cards or custom printed menus to each seat. If families are attending, creating a dedicated, engaging space for children keeps the main dining area beautifully organized.
A strictly uniform look is not necessary when you use cohesive paper goods to tie the table together. Placing personalized menu cards on individual settings helps unify eclectic tablescapes featuring mismatched tableware and linens.
This works because the matching typography and paper color create a repeating visual pattern across the entire table. Write out the night’s dishes in a bold, legible font so everyone knows exactly what to expect.
For younger attendees, consider swapping out expensive fabric items for something interactive. Using paper rolls as disposable tablecloths allows children to draw their own custom placemats to identify their assigned seats. This keeps them entertained in their own area while adults enjoy the formal setup nearby.
Actionable step: Print out small menu cards detailing the night’s courses and place them directly in the center of each dinner plate to welcome your guests.
Discover more personalized paper ideas in fall table centrepiece ideas.
Prepare Welcome Drinks and Appetizers (Day Of, Evening)
As guests arrive, shift focus from the placemat with place setting to their immediate welcome. Handing guests a chilled drink and guiding them toward a well-planned appetizer board instantly sets a hospitable tone, keeping them engaged while you finish final kitchen prep.
Your arrival spread should offer variety without requiring full dining plates or formal seating. Selecting three distinct cheeses across different texture categories ensures balanced variety for an appetizer platter presentation. Diners can graze comfortably while standing, holding a small paper napkin in one hand and a beverage in the other.
When serving arrival beverages, handle delicate stems carefully. Difford’s glassware guide explains that holding a stem or base limits fingerprints on the bowl. Offer guests their drinks without correcting how they hold the glass.
Actionable step: Arrange a simple cheese board in the living room away from the main dining table so guests can mingle without disturbing the formal place settings.
Read how to set a dinner table to master the transition from the entryway to the dining room.
|
Keep contributions visible |
How The Gourmet Host Helps You Apply Table Settings
Planning the perfect placemat with place setting requires juggling cooking timelines, headcounts, and complex dietary needs all at once. The Gourmet Host app keeps recipes, menus, RSVPs and shared planning lists together so you can focus on beautiful tablescapes and memorable conversations rather than logistical headaches.
Through the app, collect guest dietary notes with RSVPs and review them when choosing recipes. You can also invite co-hosts, assign dishes and record agreed shared expenses from your phone.
Organizing the meal digitally clears your mind for the physical table design. Having your recipes, shopping list, invites, and food preferences in one place keeps preparation easier to coordinate. This leaves you with ample time to polish your silver, iron your napkins, and execute how to set a dinner table.
Actionable step: Create an event page in The Gourmet Host app, collect RSVPs with dietary notes, and build a shared menu for guests to view.
Frequently Asked Questions
Where do utensils go on a placemat?
Utensils sit directly on the placemat, framing the main dinner plate. Place forks on the left side of the plate and knives on the right side, with the knife blade facing inward toward the plate. Position soup spoons to the right of the knives. Arrange all flatware in the order of use, working from the outside inward.
Does the napkin go on the placemat or plate?
You can place the fabric napkin in several acceptable positions depending on your aesthetic preference. Laying the napkin flat under the forks on the left side of the placemat is a traditional choice. Placing a neatly folded napkin directly in the center of the dinner plate provides a clean, symmetrical appearance.
How much space should be between place settings?
Leave enough space between neighbouring settings for the mats, plates, glasses and seated diners to fit comfortably. Test two settings with the chairs pulled in, then move your elbows and lift a glass. Adjust the gap or use fewer settings if utensils overlap or chairs press against one another.
Can you use a table runner and placemats together?
A table runner pairs beautifully with placemats when you coordinate their textures and colors. Run the table runner down the direct center of the table to hold shared serving dishes and floral centerpieces. Position the individual placemats along the outer edges of the table for each guest’s dedicated eating area.
What is the difference between a charger and a placemat?
A placemat is a protective cloth or woven mat that sits directly on the bare table surface. A charger is a large, decorative base plate that sits on top of the placemat or tablecloth. Chargers remain on the table during early courses and are typically removed before the main hot course arrives.
Where does the water glass go in a place setting?
Position the water glass in the top right corner of the placemat. It should sit directly above the dinner knife or at a slight 45-degree angle to the right of the knife tip. This specific location keeps the glass easily accessible for the diner’s right hand throughout the entire meal.
Continue Reading:
More On Table Setting and Decor
- Tablescape: The Full Table Setting And Decor Guide
- How to Build a Christmas Tablescape: A Dinner Playbook
- Place Setting Card Template: The Full Etiquette Guide
- dining table centerpiece ideas for everyday: Full Guide
- Floral Centerpiece for Dining Table: The Full Design Guide
More from The Gourmet Host
- Dining Table Etiquette: Place Setting Rules for Hosts
- How to Set a Dinner Table Like a Pro
- 7 Creative Table Setting Ideas
- Fall Table Centrepiece Ideas for Cozy Gatherings
- Elegant Floral Arrangements for Your Dining Table
Explore TGH Categories