Tableside Carving (How to Carve a Roast for Guests)
Tableside carving is not a knife task. It is the night’s centerpiece move, the one piece of theater every dinner party already has built in, and the only minute of a long evening where every guest stops talking and watches the host’s hands.
The roast on the board, the carving knife lifted, eight guests leaning forward — that is the frame.
Once the move is reframed, the rest follows. Ten specific steps turn the carving minute from a thing the host quietly dreads into the thing they most look forward to: a long carving knife and fork, a board with a juice well, a twenty-minute rest, and a sequence for whichever roast is on the platter.
At a Glance
- Tableside carving is the host’s clearest performance moment, often surrendered to the kitchen out of habit.
- Three tools cover every roast: a 10- to 12-inch carving knife, a carving fork, a board with a juice well.
- Rest before carving — twenty minutes for a rib roast or leg of lamb, fifteen for a whole turkey, ten for a chicken.
- Each roast has its sequence: turkey runs legs-then-breast, prime rib bones-off-then-slice, lamb perpendicular-then-parallel.
- Slicing against the grain decides tenderness; a three-phrase tableside script turns a silent room into conversation.
What Is Tableside Carving?
Tableside carving is the practice of slicing a finished roast at the dining table in full view of guests, rather than in the kitchen before plating. The roast sits on a carving board between host and guests, rested per the cut, while the host uses a long carving knife and carving fork to portion the meat directly onto plates passed around the table. Done well, tableside service turns the carving minute into the dinner’s most-watched moment of hosting and the single clearest signal that the host knows the meal.
Why Tableside Carving Is the Host’s Best Theater Move
A host who carves in front of the room reads as a host who hosts often. Guests register the move inside the first three slices, and the rest of the meal runs warmer. The kitchen-carve option surrenders the one minute guests later remember as the centerpiece.
Three reasons hosts who carve tableside leave a different impression:
- Visible competence — guests read knife handling within seconds; a steady stroke does more for the host’s standing than the meal itself.
- Conversation re-anchor — by the main course, side conversations have drifted. The carving move pulls the room back to one focal point.
- Portion control done warmly — slicing in front of guests lets the host read each plate (“a little end piece for you, more rare for him”) instead of guessing.
The Spruce Eats’ how-to-carve-a-turkey treats tableside service as the format a roast was built for, and our playbook for memorable dinners catalogs the moments guests carry home — the carving minute lands near the top of that list.
Bring the roast to the table. The kitchen will still be there for the dishes.
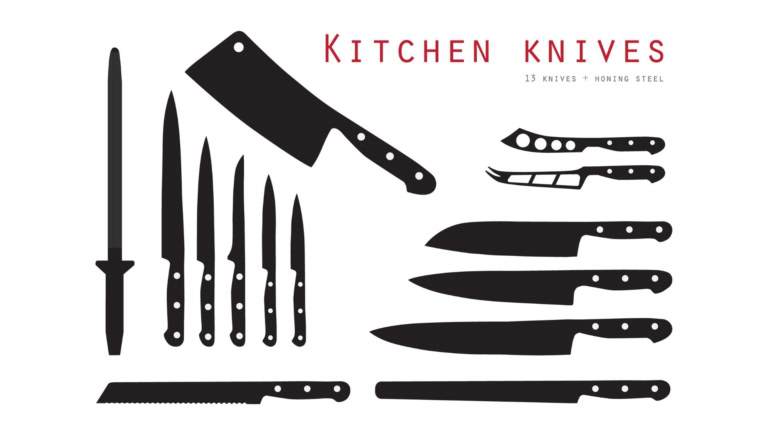
The Three Tools You Actually Need
Carving knife technique starts with the gear. Three tools cover every cut: a long carving knife, a carving fork, and a board large enough to hold the meat plus its juice. Skip one and the carving minute turns into a wrestling match.
The carving toolkit
- The carving knife is 10 to 12 inches, narrow, with a granton edge — the dimpled blade that prevents slices from sticking. A chef knife substitutes but forces more strokes per slice.
- The carving fork has two long tines (not the short three- or four-tine kitchen fork). The depth holds a hot roast steady against the slicing draw without rocking.
- The carving board is 18 by 14 inches at a minimum, with a juice well cut into the edge. The well captures the resting liquor for the gravy boat or back over the slices.
F.N. Sharp’s prime rib carving guide covers the granton-edge advantage, and the American Heart Association’s Knife Skills 101 covers the safety basics — pinch grip, claw hand, board on a damp towel — that apply to carving exactly as they do to dicing.
Three tools, one drawer, every roast you will ever serve.
|
The Host’s Tableside Kit, Saved in One Place |
The Resting Rule: Why You Must Wait Twenty Minutes
Resting meat decides whether the carved slices stay tender or run dry. Heat drives juices toward the center; cut too soon and the juice pours out instead of redistributing. Twenty minutes for a rib roast or leg of lamb, fifteen for a whole turkey, ten for a chicken, tented loosely with foil.
What rest does, in order of importance:
- Juice redistribution — protein fibers relax and pull liquid back across the cut, producing the wet, glossy slice instead of the dry one.
- Carryover cooking — internal temperature climbs another five to ten degrees. A prime rib pulled at 120 degrees lands at 125 to 130 by carving time.
- Edge stability — a rested roast holds its shape against the carving knife. A too-hot roast collapses under the fork and forces extra strokes.
Tent loosely; never wrap tight (a tight wrap steams the crust off). Certified Angus Beef’s easy-carve prime rib guide walks through the rest-and-carve sequence, and Leiths’ roast-rib-of-beef guide gives the same times from the classical-training angle.
Twenty minutes feels long when guests are hungry. It is the difference between a memorable roast and a dry one.
How to Carve a Turkey: The 8-Step Tableside Method
How to carve a turkey tableside scares cooks who do it once a year. The sequence is eight steps; rehearse twice in private and it becomes a six-minute move in front of guests.
The eight-step turkey sequence
- Step 1: Bring the rested bird to the board, breast up, legs toward the carver. Anchor with the fork at the breastbone.
- Step 2: Remove the legs. Pull each leg away from the body, slice the skin between thigh and breast, wiggle until the hip joint pops, cut through.
- Step 3: Separate thigh from drumstick at the knee. Slice thigh meat off the bone in long strokes; arrange dark meat on one side.
- Step 4: Run the knife along one side of the breastbone, top to bottom, to score the carving line.
- Step 5: With the blade angled toward the rib cage, slice the whole breast off in one piece. Set breast-side-down.
- Step 6: Repeat steps 4 and 5 on the other side.
- Step 7: Slice each breast crosswise into half-inch slices, against the grain.
- Step 8: Arrange white meat at the breast end of the platter, dark meat at the leg end, and serve.
Butterball’s carve-a-turkey guide is the baseline; Chef Jean-Pierre’s walkthrough demonstrates the breast-off-the-bone step; Downshiftology and Preppy Kitchen give two more rehearsal references.
See also our holiday dinner party guide and fall dinner party themes.
Run the eight steps twice in the kitchen before the holiday. By the third turkey, the sequence is automatic.
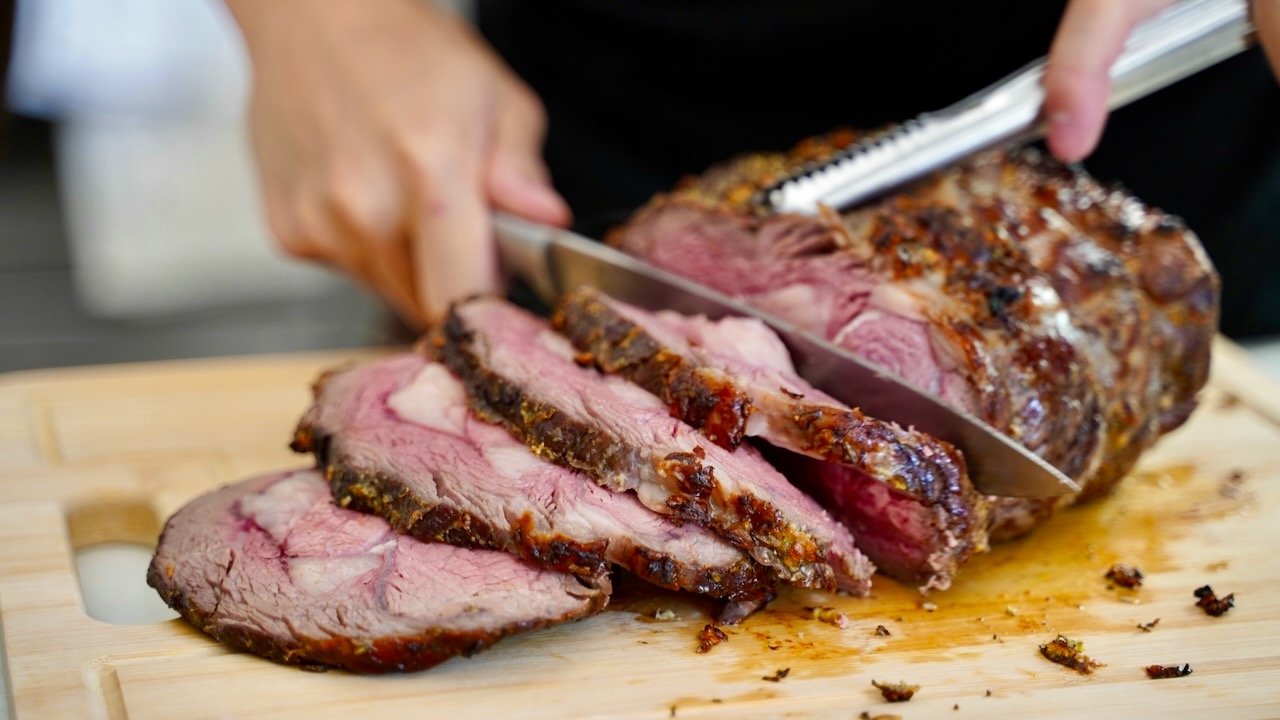
How to Carve Prime Rib or a Standing Rib Roast
How to carve prime rib is the easiest of the big roasts. The bones lift off in one piece if the butcher cracked the chine bone (ask at purchase), leaving an even cylinder that slices into perfect rounds. About four minutes for a four-bone roast feeding eight.
The prime rib carving sequence
- Stand and anchor — place the roast on the board, bones to one side. Put the fork into the top to stabilize.
- Release the bones — slide the knife along the inside curve of the rib bones, top to bottom, in one long draw. The bones release as a single rack.
- Lay and read the grain — set the boneless cylinder flat. Identify the grain direction and slice perpendicular.
- Slice in clean draws — half-inch slices for plated service. Each comes off in one continuous stroke, not multiple sawing passes.
- Plate by preference — end slices for guests who prefer well-done, center for medium-rare. Serve the bones as a cook’s treat or save for stock.
Girl Carnivore’s bone-in prime-rib walkthrough shows the bone-release move clearly. For the menu that holds a rib roast, see our main course ideas that wow dinner party guests.
Crack the chine bone at purchase, rest twenty minutes, lift the bones off, slice. Four moves; one roast every guest remembers.
How to Carve a Leg of Lamb Tableside
How to carve a leg of lamb is the trickiest of the big four because the bone runs at an angle. The bone-in technique: slice perpendicular to the bone first, then parallel underneath to release. Wrong order, and every slice has to be sawed twice.
The leg of lamb carving sequence
- Position the leg with the shank (narrow end) toward the carver, fatter end facing the guests.
- Anchor with the fork in the thickest part of the meat, away from the carving line. Wrap a towel around the shank for grip.
- Slice perpendicular to the bone, starting from the thickest end. Each slice runs straight down until the knife hits bone — quarter-inch slices.
- Once eight to ten perpendicular cuts are scored, run the knife parallel to the bone underneath in one draw. The row releases cleanly.
- Rotate 180 degrees and repeat. The shank meat is the cook’s portion — pick it off after the table is served.
Inspired Cuisine’s bone-in leg of lamb carving guide is the clearest visual reference for the perpendicular-then-parallel move. Pair the lamb with the menu and ambiance from our cozy winter dinner party guide.
Perpendicular cuts first, then one parallel sweep underneath to release. Rotate, repeat, plate.
|
Hosting Insight: Warm the Plates Before the Roast Arrives |
How to Carve a Whole Chicken in Front of Guests
Carving a whole chicken at the table is the host’s intermediate move — three minutes once the joint geometry is familiar. The sequence runs legs-first, then breast-off-the-bone, then crosswise slices, exactly like a turkey at quarter scale.
The five-step whole-chicken sequence:
- Anchor and expose — set the chicken breast-up with the carving fork in the breast. Pull one leg away to expose the hip joint.
- Release the legs — slice through the skin between thigh and breast, cut down through the hip joint. Repeat on the other side.
- Separate at the knee — divide each thigh from drumstick at the knee. Flex the leg; the natural bend marks the cut line.
- Take the breasts off — run the knife along one side of the breastbone, then angle against the rib cage to slice the breast off in one piece. Repeat.
- Slice and plate — lay each breast on the board, slice crosswise into half-inch slices against the grain. Plate dark meat on one side, white on the other.
The Mom 100’s turkey carving tips translate one-for-one to chicken. A roast chicken on a Tuesday is the host’s best rehearsal vehicle: a five-dollar bird builds the muscle memory the holiday roast requires.
Practice on Tuesday chickens. The first big roast lands easily after the third rehearsal.
Slicing Against the Grain (and How to See It)
Slicing against the grain is the one rule of carving that decides tenderness. The grain is the muscle-fiber direction — visible on the cut surface as parallel lines. Slice perpendicular to those lines; never along them.
Reading the grain in three seconds
- Look at the surface of the rested meat. Faint parallel lines run in one direction — those are the muscle fibers.
- Position the knife so the blade runs perpendicular to those lines. Each slice cuts across the fibers, shortening them.
- Short fibers chew tender; long fibers chew tough. The same cut eats like a more expensive cut when the slice is right.
This rule transforms brisket, flank steak, prime rib, and turkey breast equally. Food Network’s how-to-cut-a-brisket guide covers slicing-against-the-grain alongside the other foundational knife habits.
One look at the meat surface, one perpendicular slice, every time. The discipline is not skipping it on the rushed first cut.
|
Weekly Hosting Inspiration — Free |
The Host’s Tableside Script: What to Say While You Work
A silent host carving in front of eight people lands as performance pressure; a host who narrates in three short lines turns the same minute into conversation. The script is three phrases used in sequence — enough to fill the airtime without filling it too full.
The three phrases worth rehearsing:
- On the rest — “This sat for twenty minutes, which is what keeps it juicy.” Two seconds, one specific number, signals to guests that the host knew exactly what they were doing.
- On the grain — “I’m slicing across the grain here — that’s the difference between tender and tough.” Names the move so guests understand they’re watching a technique, not just a chore.
- On the portions — “Tell me how you like it: rare, medium, or end piece?” Hands agency back to each guest and turns the carving into a one-on-one moment with every plate.
One phrase per major step — the rest, the slice, the plate — and a smile in between. Long monologues kill the moment; complete silence makes it awkward.
Three phrases, four minutes, one carving knife. The host who narrates teaches the room how to enjoy the move.
Carving Mistakes That Lose the Room
Tableside carving is a forgiving move with four failure modes that show up when a host skips a rehearsal. Each mistake reads loudly because the carving minute is the most-watched stretch of the evening. Knowing the failures by name is half the prevention.
The four mistakes to avoid at the carving board
- Sawing the knife tears the fibers and produces ragged slices. The fix is the long single draw: one stroke per slice.
- Tilting the board sends juice pooling and forces the knife off-angle. A damp towel under the board sticks it down like a vacuum.
- Leaving meat ragged on the bone looks careless. Finish each slice with one clean release stroke at the bottom.
- Carving cold happens when a roast sits without a foil tent. Tent loosely, warm the plates, carry the roast just before slicing.
Each is a 30-second prep fix that saves the carving minute.
Tableside carving is the hosting move where preparation does ninety percent of the work and the host gets a hundred percent of the credit.
Frequently Asked Questions
Twenty minutes for a standing rib roast or leg of lamb, fifteen for a whole turkey, ten for a whole chicken. Resting redistributes juices that have been pushed to the center by heat — cutting early means the juice runs onto the board instead of staying in the meat. A loose foil tent keeps the meat hot during the rest.
In front of guests, if you can do it cleanly. The visual of a host carving anchors the meal — guests remember the moment. If you’re new to tableside carving, do the legs in the kitchen and bring the breast on the bone to the table for the visible part of the work. Half-tableside is the intermediate move.
A long, narrow blade — 10 to 12 inches — with a granton edge (the dimpled slicing edge that prevents meat from sticking). A standard chef knife works but requires more strokes. The classic carving knife pairs with a carving fork; the host uses the fork to stabilize while slicing in one continuous draw.
Look at the meat surface for parallel lines — those are the muscle fibers. Slice perpendicular to them, not along them. Cutting against the grain shortens the fibers, which is why a tough cut tastes tender when sliced correctly. The single rule that makes brisket, flank steak, and prime rib eat like a more expensive cut.
A carving fork holds meat more securely because the two long tines pierce deep and stay put. A chef fork works in a pinch but slides. For a holiday roast in front of guests, the carving fork is worth the twenty dollars — the host avoids the side-to-side wobble that signals nervousness.
Scale and joint exposure. A turkey’s joint between thigh and body is buried deeper; you wiggle the leg until the joint pops, then cut through. A chicken’s joint is closer to the surface and exposes with a quick pull. Both birds otherwise follow the same sequence — legs, then breast off the bone, then slice the breast against the grain.
Continue Reading…
More on Knife Skills
- Kitchen Knife Guide: 3 Knives Every Home Host Needs
- Cutting Board Guide: Wood, Plastic, or End-Grain
- Knife Skills for Hosts: 5 Cuts That Look Like a Pro
- How to Sharpen a Kitchen Knife: Hone, Sharpen, Test
- 5 Chef Knives Under $100 Reviewers Keep Recommending
More from The Gourmet Host
- The Host’s Playbook: Memorable Dinners for Guests
- Main Course Ideas That Wow Dinner Party Guests
- Holiday Dinner Party Planning Guide: Menus, Budget, and Timeline
- Cozy Winter Dinner Party Ambiance and Menu Ideas
- Fall Dinner Party Ideas: Themes and Ambiance Tips
Explore TGH Categories