Different Methods and Techniques For Cooking Like a Chef
 24 min read
Confidence in the kitchen starts with understanding what heat, timing, and technique are doing to the food in front of you. Once those fundamentals click, recipes stop feeling like a different language and become a set of choices you can make on purpose.
This guide breaks down dry-heat, moist-heat, and combination cooking methods, with practical examples of when each one works best. You will learn how searing differs from pan-frying, when roasting beats grilling, why braising transforms tougher cuts, and how tools such as a thermometer help you control the result.
Use this guide as a reference whenever a recipe calls for a method you have not mastered yet.
How to Choose a Cooking Method
Start with the result you want, then work backward to the heat source, pan, and timing. This quick map helps you choose a method before the prep bowls start taking over the counter.
- For a browned crust: sear in a heavy skillet with a thin film of refined oil. Pat the food dry first and leave space between pieces.
- For crisp edges with less attention: roast or air fry. Spread the food in one layer so hot air can reach its surface.
- For a tender tough cut: braise in a covered Dutch oven with liquid coming about halfway up the meat.
- For delicate fish or vegetables: steam gently and check early. The food should sit above the water rather than in it.
- For precise doneness before guests arrive: use sous vide, then dry and sear the food just before serving.
Worked Example: Pan-Seared, Then Roasted Chicken
For four boneless chicken breasts, heat the oven to 375°F and set out an oven-safe skillet, tongs, and a probe thermometer. Pat the chicken dry, season it, and heat one tablespoon of refined oil over medium-high heat. Sear the first side for 2 to 3 minutes, flip, then move the skillet to the oven.
Start checking after 8 minutes. Cooking time changes with thickness, so use temperature as the finish line. The centre of each breast should reach 165°F, the safe minimum listed by Health Canada. Rest the chicken for 5 minutes while you deglaze the pan with 1/2 cup of stock. Scrape up the browned bits, reduce the liquid for 3 to 5 minutes, then spoon the sauce over the sliced chicken at service.
Quick Troubleshooting Check
| What you see | Likely cause | What to do |
|---|---|---|
| Pale surface | Wet food or a crowded pan | Pat dry and cook in two batches. |
| Heavy smoke | Pan or oil is too hot | Move the pan off the heat briefly and lower the burner. |
| Dark crust, cool centre | Heat stayed too high | Finish in the oven and rely on the probe thermometer. |
| Thin pan sauce | Stock has not reduced enough | Simmer another minute and check how it coats a spoon. |
Dry Heat Cooking Methods
Dry heat cooking is any type of cooking method that doesn’t require water. However, not all dry cooking techniques are equal! The tools and heat source you use will have a pretty big impact on the final result.
Dry heat methods typically operate at higher temperatures and are excellent for browning, crisping, and developing rich flavors through caramelization.
Searing
Searing is the process of creating flavorful results through intense heat on a hot surface, such as a pan, skillet, or grill.
Use For:
- Giving fish and meat a crisp, flavorful exterior
- Medium to thin moisture-rich vegetables, such as zucchini, asparagus, bell peppers, mushrooms, etc.
Searing Tip:
Searing can cook some vegetables and fish all the way through, but thicker cuts of meat will need to be finished off with another slow-cooking technique. Use a meat thermometer to ensure that raw meat reaches safe internal temperatures.
Roasting
Roasting is a beginner-friendly method that cooks food in an enclosed space with hot air (typically an oven). We love to lean on roasting for weeknight dinners and fuss-free dinner party side dishes.
Use For:
- Thick, tough cuts of meat (lamb, brisket, whole birds, etc.)
- Root vegetables (potatoes, beets, squash, etc.)
Roasting Tip:
Invest in a sturdy set of baking sheets and reusable liners to make roasting more enjoyable.
Dollar store baking sheets tend to warp and lose shape over time; stainless steel sheets will last longer and are easier to clean.
Learn more about what type of pans to invest in in our guide to every home cook’s essential cookware.
Pan Frying
This is a medium to high temperature technique that uses a small amount of oil in a sauté pan to create golden, crispy exteriors.
Use For:
- Eggs, delicate filets of fish
- Thin slices of vegetables
- Breaded meat and vegetables (shnitzel, chicken katsu, etc.)
Before you say it—we know what you’re thinking…
What’s the difference between searing and pan frying?
Searing involves cooking over high heat with minimal oil for a relatively short time, and is focused on creating a brown crust. It’s also not typically used as the only cooking method, but rather as the first step before another cooking method.
Pan-frying, on the other hand, relies on medium-high heat, more oil, and longer cooking times. Because of the lower temperatures, you can easily cook food all the way through in the pan.
Deep Frying
As you probably already know from visiting your local fast food haunt, deep frying is the process of submerging food in extremely hot oil (325-400°F).
Use For:
- French fries, mozzarella sticks, and fritters
- Tempura
- Chicken wings
- Donuts
Direct Heat Cooking
Direct heat cooking refers to any cooking method that involves an open flame, such as grilling on the BBQ (or your campfire).
Because it takes considerable time to prepare and heat the grill, reserve this cooking method for weekends and special occasions.
Use For:
- Quick-cooking proteins and vegetables
- Achieving char and smoky flavors
Air Frying
Air frying is a more modern approach to cooking that requires a special appliance—an air fryer—to offer similar results as roasting or frying but with minimal oil. These work by circulating hot air rapidly around food, creating a crispy exterior similar to deep frying but using only a small amount of oil or sometimes none at all.
This makes it one of the healthier dry heat cooking methods while still achieving flavorful results.
Use For:
- Low-oil French fries or sweet potato fries
- Crispy chicken wings and drumsticks
- Root vegetables like Brussels sprouts, carrots, and parsnips
- Breaded items like chicken tenders or fish sticks
Air Fryer Tip:
If you’re cooking for a large group, cook items ahead of time and reheat them briefly in the air fryer just before serving. Since most air fryers have limited capacity, this batch-and-reheat approach ensures everything stays crispy without keeping guests waiting.
Moist Cooking Methods
Contrary to all the different cooking methods and techniques we just explored, moist cooking methods rely on water as an integral part of the process. These techniques use liquid or steam as the primary heat source to cook food.
Because water is an incredible conductor of heat, these water-based techniques typically operate at lower temperatures (often at or below the boiling point, 212°F/100°C).
Boiling
The most basic water-based method, this involves rapidly cooking a food item at medium-high temperatures by submerging it in boiling water.
Use For:
- Eggs, pasta, root vegetables, soup stock
Steaming
Steaming is a gentle cooking method for delicate foods that preserves more nutritional value and structure compared to boiling.
Use For:
- Halibut, cod, salmon
- Dumplings
- Delicate vegetables and greens (asparagus, swiss chard, rapini, etc.)
Slow Cooking
This involves using a slow cooker, like the Instant Pot or Crock-Pot, to cook at a low temperature (200-250°F) for extended periods of time (4-8+ hours).
Use For:
- Stews & chillis
- Pulled pork or pulled chicken
- Beans and legumes
- Long-simmering soups
- Fall-off-the-bone ribs
Braising
Braising uses a covered pot or Dutch oven on the stovetop or in the oven to slowly cook at a medium-high temperature (around 300-350°F in the oven) for rich flavors. While slow cookers are more of a set-it-and-forget-it kind of thing, braising gives you more control and a slightly shorter cooking time (~2-4 hours).
Use For:
- Tough cuts of meat (short ribs, lamb shanks, beef cheeks, occo buco)
- Whole chicken legs or thighs
- Pork shoulder or pork belly
Pressure Cooking
This method uses high heat and a special, pressure-sealed pot to quickly prepare dishes or food items that would typically take longer to cook through.
Pressure Cooking Tip:
An Instant Pot also functions as a pressure cooker!
Use For:
- Legumes (beans, lentils, chickpeas, etc.)
- Soups and stews with hardy ingredients that need to be cooked quickly
Advanced Moist Heat Methods
If you’ve already experimented with all these different cooking methods and techniques, this section is for you!
Consider trying these more exploratory methods as your next culinary adventure.
Sous Vide Cooking
This is a precision low-temperature technique used by restaurants and professional chefs to produce that ever-so-perfect texture for meat and veggies.
Sous vide cooking works by sealing food in an airtight plastic bag and submerging it in a water bath held at a precise, constant low temperature for an extended period. This allows food to cook evenly throughout without overcooking, as it can never exceed the water temperature.
For more information about sous vide cooking, check out our article on advanced culinary techniques.
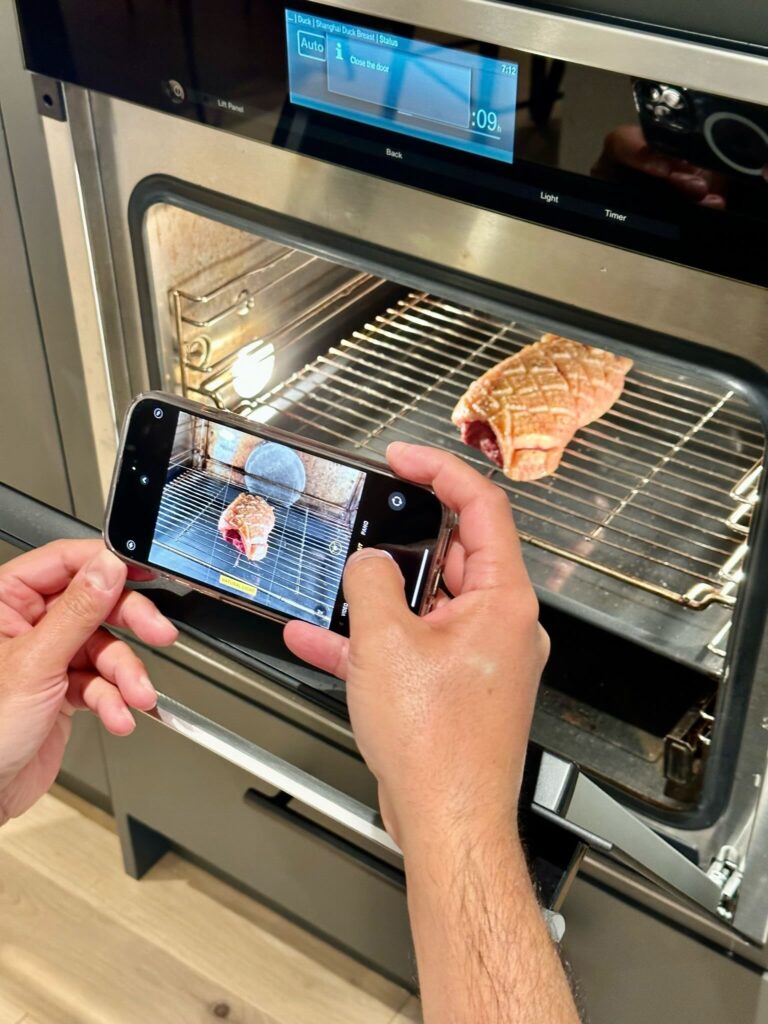
Combi Steam Oven Technology
There is just SO MUCH we could say about our steam oven. Those who know us or have been to our home have definitely heard us go on a tangent about all the different features and how often we use them all.
We’re not exaggerating when we say it’s been an absolute game-changer for how we prepare dinners in our house. With over 100 modes, it makes it easier than ever to create healthy, wholesome meals, especially during the week when we’re pressed for time.
One of our favorite meals to make is salmon with beans and quinoa. The Combi’s multi-level steaming ensures all of these are ready at the same time, leaving us with a healthy, flavorful meal and minimal clean-up.
If you’re interested in outfitting your kitchen for long-term success, check out our guide to essential kitchen appliances or cookware essentials.
Combination Cooking Techniques
Once you start getting the hang of these basic cooking methods, you’ll start to get the sudden urge to get creative and combine them.
Follow that urge—your taste buds will thank you.
Try combining a dry heat and moist heat method, starting with one technique and finishing off with the other.
Here are two of our favorite combinations for achieving complex flavors and textures.
1. Pan-Seared then Oven-Roasted (Beginner)
This technique pairs direct contact browning with gentle, even oven cooking to maximize moisture and flavor without burning the outsides or drying them out.
We love this combo because it gives you control over the crust development and internal doneness separately.
Best Used For:
Thick steaks, pork chops, or chicken breasts.
Method
With this approach, you’ll start by searing your meat in a hot pan on the stovetop to develop a rich, flavorful crust. Sear for 2-5 minutes per side, resting for 3 minutes in between; the exact time will depend on the cut of your meat.
Then you’ll transfer your meat to the oven to finish cooking at lower temperatures (300-400°F, depending on the cut).
2. Sous Vide + Sear Combination Cooking (Advanced)
If you have a thick, juicy Tomahawk steak that you want to get just right for your dinner party, look no further!
This combination cooking technique ensures your meat is cooked exactly to your preferred temperature edge-to-edge, with no gray band of overcooked meat. The result—perfect doneness throughout with a flavorful, caramelized crust.
Note: This is kind of like the inverse of the above combination (sometimes referred to as a “reverse-sear”), but with more precise cooking techniques.
Method
With this approach, you’ll slow cook your meat in a hot water bath based on your preferred meat temperature before patting it dry and pan-searing it for a flavorful crust.
For an in-depth overview of the sous vide method and when to use it, read our guide to 4 advanced cooking techniques for creative home cooking.
Hosting Tip:
The sous vide cooking stage can be done well before guests arrive, making it ideal for entertaining. It’s also a great way to avoid any burnt or undercooked meat and avoid hosting disasters.
Choosing the Right Method for Different Occasions
Learning how to sous vide a steak can help you create some seriously impressive showstoppers for your dinner parties. But that doesn’t mean it’s a practical move for Wednesday night dinner.
Here’s how we delegate different cooking methods and techniques in our household.
Weeknight Strategies
The main goal for weeknight dinners is to create healthy meals in a short period of time. That’s why our combi steam oven is our go-to tool, offering a variety of different cooking methods at lower temperatures.
If we’re craving something a little different, we might pop some sweet potato wedges or chicken tenders into the air fryer with a fresh salad.
Roasted veggies are also a core staple for simple, nutritious side dishes in a pinch.
Special Occasion Techniques
Now, when it comes to special occasions, you bet we whip out all the stops.
This can look like using our oven’s sous vide mode, which we combine with grilling for fancy cuts of meat, like our famous 48oz cowboy steaks.
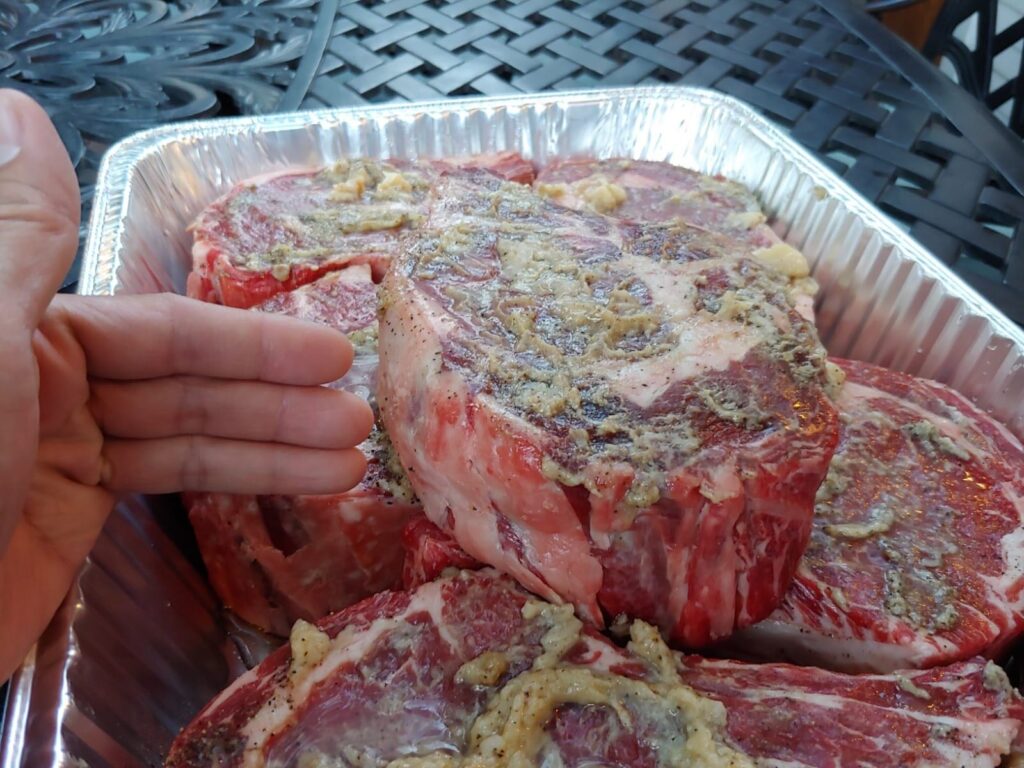
We might marinate some of the vegetables or meat for 24 hours ahead of the dinner party to enhance the flavor and moisture.
We also save any whole poultry adventures (i.e., whole roasted chicken, turkey, or duck) for special events, once again turning to our trusty Combi Oven’s Gourmet Chicken or Gourmet Turkey mode.
Believe us, we swear we are not affiliated with the Combi Steam Oven—we just really love it that much!
Another technique we love to use for milestone occasions is slow cooking or braising over extended periods, filling the house with a delicious aroma as guests pour in.
Although we are mostly a low-oil, health-conscious household, we may occasionally experiment with a special deep-fried item or garnish such as tempura or French fries for some of our themed parties.
Ready to Show Your Friends Your New Cooking Skills?
Listen, we’re not expecting you to be ready to host a Michelin-starred gala. But we do hope you have enough of a library to start feeling 10% more confident in the kitchen.
Who knows…maybe you even start planning a little get-together?
Maybe you finally tackle that aspirational recipe that you bookmarked in your cookbook a year ago.
Maybe you just start approaching your weekly meal prep with a bit more creativity. Start by checking out this article on how to get better at home cooking in 5 hours every week!
If you are ready to start sharing your newfound kitchen tricks with your friends, check out our in-depth guide on how to host a dinner party. Plus, our time-stamped dinner party planning checklist is also here to help you schedule everything so that you can stress less and actually enjoy the party. And remember, your kitchen setup is key to pulling off a successful dinner party!
Quick Cheat Sheet of All the Cooking Methods
Before we dive into the chef-level touches that come next, here is the at-a-glance map of every method we walked through above. Keep this section bookmarked on your phone for grocery store decisions and last-minute menu swaps. We organize the list the same way most culinary schools do, split by whether water is part of the cooking process, then layered by heat intensity.
- Dry heat, no fat: roasting (300-450°F oven), grilling (open flame), air frying (rapid hot air, minimal oil).
- Dry heat, with fat: searing (very high heat, thin oil film), pan frying (medium-high, shallow oil), deep frying (325-400°F submerged oil).
- Moist heat, water-based: boiling (212°F), poaching (160-180°F, a gentler cousin of boiling), steaming (vapor, around 212°F).
- Moist heat, long and low: slow cooking (200-250°F for 4-8 hours), braising (300-350°F covered, 2-4 hours), pressure cooking (sealed, high heat, short time).
- Advanced or hybrid: sous vide (precise water bath plus a finishing sear), combi steam (oven that toggles between dry, steam, or both), reverse sear, pan-sear-then-roast.
Cook’s Illustrated and the Culinary Institute of America both teach this same dry-versus-moist framework, so you are learning the structure professional kitchens actually use. If you are still building out your kitchen, our complete cooking techniques list for confident home hosts goes deeper on each method’s history and use cases, and our guide to kitchen cooking tools every host needs covers the equipment pairings.
One framing rule we lean on when we plan a dinner party menu: every dish on the plate should come from a different method, which means four different pans, four different timers, and zero traffic jams at the stove. Next, we move from the map itself into the chef-level finishing moves that turn any method into restaurant food.
Gourmet Finishing Techniques That Separate Home Cooks From Chefs
Going back to the combination cooking we walked through above, the real reason restaurant food tastes different is rarely the main method. It is the small finishing moves a line cook does in the last 90 seconds before a plate goes out. None of these are difficult.
They just take naming.
The four moves line cooks rely on
- Resting the protein: let steak, chicken breast, or pork chop sit on a board for 5-10 minutes before slicing so the juices redistribute instead of spilling onto the board (Serious Eats confirms this with side-by-side tests).
- Basting with butter and aromatics: in the last two minutes of a sear, tilt the pan, add a knob of butter with a smashed garlic clove and a thyme sprig, and spoon the foaming butter over the protein for a glossy, herb-scented crust.
- Deglazing and pan sauces: the brown bits stuck to the pan after a sear are fond, and they are pure flavor. Splash in wine or stock, scrape with a wooden spoon, reduce by half, and whisk in cold butter for an instant sauce.
- Finishing salt and acid: a pinch of flaky salt (Maldon, fleur de sel) and a squeeze of lemon, vinegar, or good olive oil right before serving wakes up almost any dish.
Why these four punch above their weight
NYT Cooking’s Melissa Clark and America’s Test Kitchen both treat basting and deglazing as the single highest-return techniques a home cook can learn, because they convert heat and fat into aroma you can smell from the dining room. None of them add steps to the original recipe. They piggyback on the sear you were already doing, which is what makes them sustainable on a weeknight.
Read more about layering flavor in our guide to how to season food so every dish tastes like you meant it.
Once these four moves feel automatic, the next question becomes what to put on the plate around the protein, which is exactly where the side-dish map below comes in.
Common Side Dishes Organized by Cooking Method
Building on the cheat sheet above, here is how we map the most common dinner party sides to a method. We use this list when we are staring at a protein and trying to figure out what vegetable to put next to it without doubling up on the oven or the stovetop. Walk it in this order when you build a menu:
- Roasted sides (the everyday default): potatoes, carrots, parsnips, Brussels sprouts, cauliflower, butternut squash, beets, broccoli, asparagus. Cut to a uniform size, toss in oil, salt, and a hardy herb, then roast at 425°F for 25-35 minutes.
- Steamed or boiled sides (fast and clean): mashed potatoes, rice, quinoa, couscous, green beans, peas, edamame, corn on the cob, steamed dumplings. These hold for 30 minutes under a tea towel if your dinner runs late.
- Grilled or seared sides (for warm-weather hosting): grilled corn, charred zucchini and bell peppers, seared halloumi, grilled romaine, blistered shishito peppers, grilled stone fruit. These all want a hot grate and minimal flipping.
- No-cook sides (the pressure valve): a green salad with a sharp vinaigrette, sliced tomatoes with flaky salt, a citrus and fennel salad, a cheese and charcuterie board, crudités with whipped feta or hummus.
How we pair them against the protein
The rule of thumb is one warm method per side, and no two sides from the same row. A roasted protein loves a steamed grain and a no-cook salad next to it, because the oven, stovetop, and counter all carry one job apiece. Eater calls the roasted-vegetable approach the side dish recipe that needs no recipe, and we agree, but it works best when something cool and bright sits opposite it on the plate.
Hold one quick-finish item back:
- A small bowl of flaky salt and a halved lemon at the table covers underseasoning without a re-cook.
- For a full menu-building walk-through, see our dinner party menu planning guide or the 3 complete main-course menus.
What happens in the pan beneath those sides matters just as much as the method itself, and that comes down to the fat you cook in.
Choosing the Right Fat or Oil for Each Cooking Method
Beyond the cooking method itself, the fat in your pan is half of the result. Each oil has a smoke point, the temperature at which it starts to break down, taste bitter, and fill your kitchen with smoke. Cook’s Illustrated keeps a smoke point chart in almost every issue for this reason.
Here is the short version, sorted by the heat range you reach for it.
High and medium heat, by method
For searing and deep frying, reach for refined oils with smoke points above 400°F. Avocado oil is our weeknight default because it is neutral, takes high heat without breaking, and works in everything from a stovetop sear to a finishing drizzle. For pan frying and sautéing in the middle of the dial, olive oil and butter both sit comfortably, with ghee or clarified butter giving you butter flavor at higher temperatures when you want both at once.
Smoke point shortlist
- Avocado oil (520°F): the all-purpose high-heat choice, neutral enough for searing, frying, and a finishing drizzle.
- Refined peanut, sunflower, grapeseed (420-450°F): solid backup high-heat oils when avocado is out, all neutral in flavor.
- Olive oil (375-410°F) and butter (around 350°F): the medium-heat workhorses for sautéing, pan frying, and quick weeknight vegetables.
- Ghee or clarified butter (485°F): the bridge fat when you want butter flavor at sear temperatures without burning the milk solids.
- Finishing oils (never in the pan): good extra virgin olive oil, walnut, hazelnut, and toasted sesame, drizzled over the plate just before serving.
Pan Fat Tip:
For the steakhouse-style sear from the combination cooking section above, start with a high-smoke-point oil to build the crust, then add a knob of butter and aromatics in the final 60 seconds for flavor. This solves the biggest sear problem in a home kitchen: butter alone burns before the crust forms, and oil alone tastes flat. If you are still building your pantry, our list of ingredients for a well-stocked kitchen covers which two oils and which butter to keep on hand.
Even with the right oil and the right method, a handful of small mistakes still sink the result, so the closing section names the ones we see most often.
The Mistakes That Quietly Ruin Each Cooking Method
Every method we covered above has one or two failure modes that show up over and over in our kitchen and in the recipe-test write-ups from outlets like Serious Eats and America’s Test Kitchen. Here is the short list of what to actually avoid, organized so you can scan it before you start cooking.
Method-by-method pitfalls
The pattern across all of them is the same: temperature and crowding. Either the pan or oven is not as hot as you think, or you piled too much food into it. Once you fix those two, the per-method details become easy to remember.
Work through this list in the order you would meet them on a single dinner party plate:
- Searing: cold protein straight from the fridge, a crowded pan, wet meat, or flipping too early. Pat dry, give the pan space, and let the crust release on its own. If you have to pry it, it is not ready.
- Roasting: vegetables piled in a heap on the sheet pan, an oven that is not fully preheated, and not enough oil. Eater’s recipe team recommends two tablespoons of oil per pound of vegetables as the baseline for proper browning.
- Deep and pan frying: oil that is too cool gives a greasy result, oil that is too hot burns the outside before the inside cooks. Use a thermometer, aim for 325-375°F, and drop in small batches so the temperature does not crash.
- Boiling and steaming: unsalted pasta water (it should taste like the sea), boiling vegetables you should be steaming, and lifting the steamer lid every 30 seconds to peek. Trust the timer.
- Braising and slow cooking: skipping the initial sear loses the deep Maillard flavor, too much liquid (it should come halfway up the meat, not cover it), and too high a temperature so the meat tightens before it breaks down.
Hosting Recovery Tip:
If a method goes sideways mid-dinner party, our guide on how to recover from a kitchen disaster walks through five rescue moves for overcooked meat, broken sauces, and burnt sides. With those guardrails in place, you have the full method-plus-finish-plus-rescue stack a confident host needs at the stove.
Still need some more help pulling it all together? Explore The Gourmet Host App to plan events, get menu ideas based on your preferred cooking techniques, and build a recipe library.
Coordinate with co-hosts, assign tasks, and split costs—basically, support for everything from raw ingredients to seamless hosting.
Frequently Asked Questions
What cooking techniques should I start with as a beginner?
Start with simple dry heat methods: roasting, air frying, and pan frying. Steaming works well for healthy weeknight dinners and easy side dishes. If time is tight, an Instant Pot or Crock Pot handles soups, stews, and tender meats, and doubles as a way to keep dishes warm for guests.
What techniques should experienced cooks try next?
Try combination cooking techniques next, like pan-searing followed by roasting, which layers a crisp crust over even interior doneness. If your kitchen budget allows it, advanced cookware such as a Miele Combi Steam Oven expands what you can do. For more depth, explore sous vide and other advanced culinary techniques.
Which cooking methods should every home cook know?
Learn roasting, sauteing, braising, boiling, and grilling, and you can cook most things you will ever want to serve. Each one handles a different problem: dry heat for browning, wet heat for tough cuts, direct flame for speed. Everything else is a variation built on top of those five.
How do I practice a technique without wasting food?
Practise on the cheapest ingredient that behaves the same way. Onions for knife work, chicken thighs for searing, and a single potato for anything involving fat temperature. Cook one portion rather than four, and repeat it on consecutive days so the result is still fresh in your hands.
Do I need special equipment to cook like a chef?
No. A heavy pan that holds heat, one sharp knife, and a probe thermometer cover almost everything on this list. Technique matters far more than gear, and a thin pan is the single most common reason a home sear fails to brown properly.
How long does it take to learn a new technique?
Most home cooks get comfortable with one method after about five attempts, spread across a few weeks. Repeat the same technique on the same ingredient so you can tell what changed each time. Switching dish and method together is what makes progress feel slow and hard to measure.
Continue Reading:
More On Cooking Techniques
- 4 Advanced Methods & Techniques For Creative Home Cooking
- Cold Smoking vs Hot Smoking: Which Technique Is Right for You?
- How to Flambé at Home: A Host’s Guide to Safe Flames
- How to Make Homemade Pasta: A Hands-On Hosting Skill
- How to Sous Vide: The Stress-Free Technique Every Host Needs
- The Best Hot Sauce Making Kits for a DIY Dinner Party Activity
- The Complete Cooking Techniques List for Confident Home Hosts
More from The Gourmet Host
- Minute to Win It Games for Adults (25 Funny Picks)
- Instead of Cocktail Hour, Try These Wine and Snacks Combos
- Birthday Party Decorations for Adults: Themes That Work
- Birthday Party Ideas for Adults That Feel Worth the Effort
- Fun Wine Tasting Games to Play at Your Next Party
Explore TGH Categories
- Set the Scene
- Drinks and Bar
- Plan the Meal
- Engage with Guests
- Games and Toasts
- Tools and Techniques
- Why We Gather