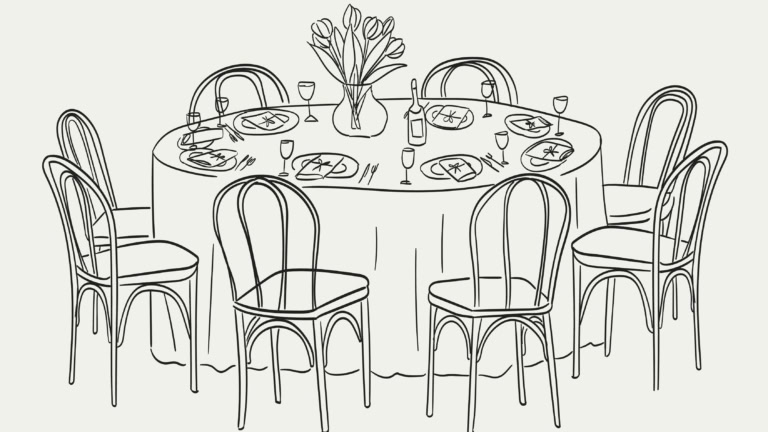
Graduation Party Centrepiece Ideas to Celebrate
Graduation season arrives with a long to-do list—invitations, food, seating—and the centrepieces often get pushed to the night before. That scramble is avoidable. The best graduation party centerpieces take thirty minutes or less to assemble, cost under twenty dollars each, and carry a personal detail—a photo, a school crest, or the grad’s year in gold glitter—that store-bought decor cannot match.
We’ve pulled together the strongest graduation party centerpiece ideas into themed groups, each with make-ahead notes and school-colour swaps, so you can build every centrepiece days in advance and actually enjoy the party.
At a Glance
- DIY grad cap centrepieces anchor a table with school spirit and take under thirty minutes to build.
- Photo-based centrepieces turn the graduate’s journey into a visual conversation starter guests will gather around.
- Mason jar and budget-friendly ideas deliver polished results for under ten dollars per centrepiece.
- Every design in this collection includes a make-ahead window and school-colour swap notes.
- Adapting centrepieces for small dining tables or large outdoor setups keeps the look cohesive without crowding.
What Are Graduation Party Centrepieces?
Graduation party centrepieces are the focal-point displays you place on dining tables and buffet surfaces to mark the occasion—and they’re the first thing guests notice when they walk in. A well-chosen centrepiece ties the graduate’s personality, school colors, and celebration theme into a single visual anchor that makes the whole party feel intentional. What sets graduation centrepieces apart from general party decor is their built-in personalisation: a year, a name, a set of college colors, or a photo timeline that no other celebration calls for.
DIY Grad Cap Centrepieces That Show School Spirit
A handmade graduation cap centrepiece is the fastest way to anchor your table in school spirit. Most versions use card stock, hot glue, and a wooden dowel. Build them in batches three to five days ahead and store flat until party morning.
- Classic card-stock grad cap on a dowel — A square of coloured card stock folded into a mortarboard shape, hot-glued to a painted dowel, and set into a foam base. Make six at once in your school colors and cluster three per table for a fuller look—total material cost runs about four dollars each.
- Cricut-cut tassel cap with the graduate’s name — A Cricut machine or craft knife cuts the graduate’s name from glitter card stock and affixes it to the cap’s top. Pair gold glitter lettering with a black cap for a sharp contrast that photographs well under both daylight and fairy lights.
- Stacked-book base with mini cap topper — Three thrift-store hardcovers stacked and tied with ribbon, topped with a palm-sized grad cap made from card stock. These work especially well for bookish centerpieces at a high school grad party where the guest of honor loves reading.
- Balloon-weight grad cap — A foam-core grad cap doubles as a helium balloon weight, keeping a metallic balloon cluster grounded at the centre of the table. Swap balloon colours to match college colors and attach a tag showing the graduation year for a personal touch.
- Oversized foam-board cap for a buffet focal point — A large foam-board cap—roughly eighteen inches square—commands attention on a buffet or gift table rather than a dining surface. Lean it against a vase of white flowers for height, and add a prop stick on the back so it stands upright without support.
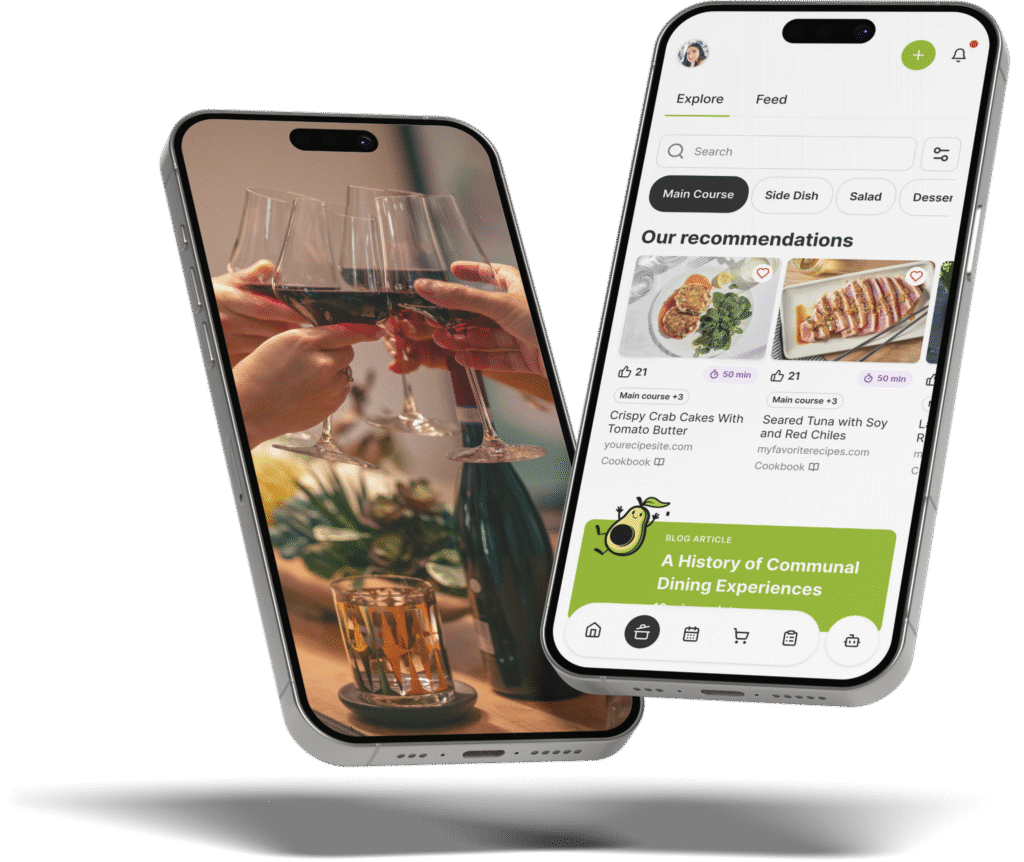
Once you settle on a cap style, use The Gourmet Host app to map out your full table layout—centrepieces, place settings, and serving stations—so everything fits before the party starts.
For step-by-step cap-building tutorials with printable templates, Oh My Creative’s graduation centrepiece guide and She’s Crafty’s graduation table walkthrough both offer detailed photo instructions you can follow in a single afternoon.
With a grad cap anchoring the table, the next layer of personalisation comes from photos—the element guests are most drawn to.
Photo-Based Centrepieces Worth the Extra Effort
Nothing sparks conversation at a grad party like a centrepiece built around the graduate’s pictures. These designs turn a timeline of school photos into a visual story guests browse while they eat. Print photos at home or pick them up from a one-hour lab—either way, assemble the night before so adhesive sets fully.
- Photo cube on a riser — Four printed photos glued to the faces of a wooden or acrylic cube, set on a riser to clear the table clutter. Rotate each face to show a different school year—kindergarten through graduation—and guests will naturally pick it up and spin it.
- Framed photo with fresh flower ring — A single 5×7 framed portrait of the graduate surrounded by a low ring of fresh flowers in school colors. Place baby’s breath and white roses in small vases around the frame for a clean look, or swap in seasonal blooms for a spring party.
- Photo fan on a dowel — Five to seven wallet-sized photos fanned and glued to a single painted dowel, creating a peacock-tail display that stands in a mason jar. The fan shape adds height without blocking sightlines—ideal for a seated dinner table where guests need to see each other across the centrepiece.
- Floating photo vase — A tall glass cylinder filled with water and a waterproof printed photo submerged inside, creating a magnified floating-image effect. Drop a battery-operated LED at the bottom to light the photo from below—this is the right place for a dramatic head-table centrepiece.
Displaying photos of the grad as centrepieces creates stronger emotional reactions than decor alone. Grad centerpieces built this way are a great way to spark conversation without any extra effort. For a full tutorial, Simply 2 Moms’ graduation centrepiece tutorial breaks down each step. And if you want to incorporate florals into photo displays, She Gave It A Go’s floral grad centrepiece ideas shows how to pair blooms with printed photos seamlessly.
Photo centrepieces deliver personality without a big price tag—especially when you build them around mason jars and dollar-store supplies.
|
🎓 Plan Your Grad Party Layout in Minutes |
Mason Jar and Budget-Friendly Centrepiece Ideas
A tight budget doesn’t mean bare tables. Mason jars are the go-to base because they cost under two dollars and accept paint, ribbon, or vinyl lettering. Combine them with fresh flowers, fairy lights, or printed labels to build an eye-catching centerpiece for less than ten dollars per table.
- Painted mason jar trio in school colors — Three mason jars painted in alternating school colors, filled with baby’s breath or white flowers, grouped on a wooden tray. Spray-paint them two days ahead; they’re fully dry and stackable within twenty-four hours.
- Fairy-light mason jar — A single quart-sized jar filled with a coil of warm-white fairy lights, sealed with a ribbon in the school’s accent colour. These double as evening ambience once the sun sets—line five along a buffet table for a warm glow that lasts six-plus hours on fresh batteries.
- Vinyl-lettered grad year jar — The graduation year cut from adhesive vinyl and pressed onto the jar’s front, filled with candy or small party favours. Guests often take these home as keepsakes—a fun idea that does double duty as both centrepiece and party favour.
- Simple bucket with diploma rolls — A galvanised simple bucket holding rolled card-stock diplomas tied with ribbon and a small bouquet of fresh flowers. Assemble the diploma rolls while watching a show—ten minutes for a dozen—and store them in the bucket until party day.
- Dollar-store trophy jar — A mason jar hot-glued to a dollar-store candlestick, spray-painted gold, creating a trophy silhouette for under three dollars. The best part is the touch of elegance it adds—fill the top with gold glitter confetti and a mini pennant flag in the school’s colours for a playful nod to the graduate’s achievements.
In our experience hosting graduation gatherings, the mason jar centrepieces draw the most compliments relative to their cost—guests assume they took far longer to make than they did. For more jar-based inspiration, Twins Dish’s graduation centrepiece collection covers a wide range of styles.
Making Frugal Fun’s DIY graduation table ideas focuses on designs under five dollars, and Dollar Tree’s grad centrepiece projects shows what you can build with a single store trip.
Budget-friendly centrepieces scale easily—but the way you arrange them depends on whether you’re working with a small dining table or a large outdoor spread.
|
📨 Get Weekly Hosting Inspiration |
How Do You Adapt Graduation Centrepieces for Any Party Space?
The centrepiece that looks perfect on a six-person dining table can disappear on a twelve-foot banquet setup. Adapting your grad centrepieces starts with one measurement: the distance from the centre of the table to the nearest place setting. Keep centrepieces within that radius and below twelve inches tall so no one cranes around a display to talk.
- Small dining table (4–6 seats) — One centrepiece at the centre, no wider than ten inches, paired with a low ring of scattered confetti or petals. A single photo cube or painted mason jar trio works here without competing for plate space.
- Long banquet table (8–12 seats) — Repeat a smaller version of the same centrepiece every three to four feet down the table’s centre. Use odd numbers—three or five clusters—to create a visual rhythm that draws the eye down the full length of the table.
- Outdoor folding tables — Weight matters outside; choose heavier bases like mason jars filled with sand or stones to resist wind. Clip a laminated photo to a weighted dowel so prints don’t blow away during a breezy backyard grad party.
- Buffet or gift table (no seating) — Go taller here—eighteen to twenty-four inches—since no one is sitting behind the display. The oversized foam-board grad cap or a tall balloon cluster paired with a photo garland turns a food station into a stunning focal point.
For more on decorating party spaces, Life is a Party’s home decoration ideas covers layout strategies for every room. And Classpop’s decoration ideas include balloon and backdrop combinations that scale from a living room to a full backyard.
From our years of gathering around the table, we’ve learned that the best-decorated parties follow one rule: pick one hero centrepiece, repeat it consistently, and let everything else support the party theme.
For guidance on complementary place settings, our creative table setting ideas cover place-card and charger combinations that pair with grad decor. If you’re planning the meal alongside the decor, our planning checklist keeps food, drink, and setup timelines in one place.
Start with one design from the lists above, customise it in your school’s colours, and build enough for every table. If you want help setting the right ambience beyond centrepieces, our tips will round out the atmosphere.
For theme ideas, our theme guide covers frameworks you can adapt to any milestone. The Gourmet Host app pulls layout, menu, and guest list into one place—so you celebrate the graduate, not the to-do list.
Frequently Asked Questions
Choose two to three items per table that carry the school’s colours—painted mason jars, ribbon wraps, or card-stock grad caps. Keep the rest of the table neutral with white linens and clear glassware so the school colours pop without overwhelming the setting.
Painted mason jars, card-stock grad caps on dowels, and photo fans made from printed wallet photos all cost under five dollars per centrepiece. Buy materials in bulk from a dollar store and batch-assemble them in one session to save both money and time.
Use photo cubes, framed portraits with flower rings, or a mini clothesline garland strung between dowels. Print photos at home or use a one-hour lab, and assemble displays the night before so adhesive and paint have time to cure fully.
Most DIY centrepieces—painted jars, card-stock caps, photo cubes—can be assembled three to five days ahead and stored in open boxes with tissue paper between layers. Add fresh flowers the morning of the party to keep them looking sharp through the entire celebration.
Grad cap centrepieces, photo-based displays, and mason jar arrangements all work well because they personalise easily with the graduate’s name, year, and school colours. The best option depends on your budget, table size, and whether you prefer a DIY or store-bought base.
Fairy-light mason jars, vinyl-lettered jars with the graduation year, and dollar-store trophy jars spray-painted gold are among the easiest options. Each takes under fifteen minutes per unit and requires no special tools beyond scissors, a hot-glue gun, and spray paint.
Continue Reading:
More On Party Decoration Ideas
- 7 Creative Table Setting Ideas For Your Next Dinner Party
- Centrepiece Ideas for Every Dining Room Table
- Dinner Decorations Ideas for Every Occasion
- Elegant Floral Arrangements for Your Dining Table
- Fall Table Centrepiece Ideas for Cozy Gatherings
- Party Decoration Ideas That Set the Scene
- Spring Table Decor Ideas That Feel Fresh
More from The Gourmet Host
- Date Night Dinner Ideas That Make Staying In Worth It
- Date Night at Home Dinner Ideas Worth Cooking for Two
- Essentials Series: Ingredients for a Well-Stocked Kitchen
- Fall Themed Dinner Party Ideas and Menus
- Interactive Dinner Party Ideas: Cooking Together for Memorable Gatherings
Explore TGH Categories