How to Sous Vide: The Stress-Free Technique Every Host Needs
Sous vide sounds like a professional kitchen technique, and it was — until a few years ago, when home immersion circulators dropped below the price of a decent frying pan. Now any host can vacuum-seal a protein, set a precise temperature, walk away for hours, and come back to a result that no amount of oven-watching could match. The lamb comes out edge-to-edge pink. The chicken breast stays juicy at temperatures that would dry it out in a pan. And all of it happens while you set the table, prep sides, and greet guests at the door.
Below is everything you need to start: gear, process, timing, and the best cuts to serve a full table.
At a Glance
- Sous vide cooking uses a precise water bath to cook food sealed in a plastic bag at a controlled, low temperature.
- An immersion circulator, a pot, and a sealable bag are enough to start — no professional sous vide equipment required.
- Proteins cook unattended for hours, freeing the host to prepare sides and welcome guests.
- A quick sear after the bath adds colour and texture in under two minutes.
What Is Sous Vide?
Sous vide is a method of cooking in which food is vacuum-sealed in a bag and submerged in a container of water held at a specific temperature for a set period of time. It matters for hosts because the cooking process is entirely hands-off — once the bag enters the water bath, you set a timer and walk away. The distinguishing characteristic is precise temperature control: a sous vide machine holds the water at an exact temperature so the food never exceeds the doneness you choose.
What Makes Sous Vide a Host’s Best-Kept Secret?
The honest answer is timing. Every host knows the stress of pulling a perfectly cooked main off the stove the moment guests sit down. Sous vide cooking eliminates that pressure because food cooks at low temperatures over a long time without risk of overcooking.
A chicken breast held at 150°F for an extra thirty minutes tastes just as tender as one held for sixty — a generous window that no other cooking technique offers.
According to Anova Culinary’s full sous vide overview, the technique was developed in the 1970s by French chefs seeking consistent results in high-end restaurants. Professional chefs prepared proteins in advance and finished to order — the same principle works at home.
- Consistency without babysitting: The water temperature stays constant, so food cooks evenly edge to edge.
- Flavour locked in: Food cooks in its own juices inside the sealed bag, intensifying seasoning rather than washing it away.
- Stress-free hosting: Once the bag is in, you are free to set the table, welcome guests, or finish side dishes.
In our experience hosting, sous vide is the single technique that changed how we plan an evening — the stove stays free, the oven handles sides, and the main is done before anyone arrives.
Understanding the sous vide equipment makes starting even easier than you might expect.
|
Hosting Techniques Delivered to Your Inbox Every Week |
Sous Vide Equipment: What You Actually Need
You do not need a commercial kitchen to cook sous vide. A sous vide immersion circulator is the one essential purchase — it clips to any pot and heats the water to your desired temperature with even circulation throughout the bath.
The beginner’s equipment guide from Less Philing recommends starting with what you own. A large stockpot works as a sous vide water bath. For bags, dedicated vacuum sealer bags offer the tightest seal, but freezer Ziploc bags using the water displacement method work nearly as well for home use.
- Immersion circulator (essential): Precision cookers from Anova, Joule, or Breville start around $80 and hold temperature within a fraction of a degree.
- Container or pot (essential): Any pot that fully submerges your food items works. A 12-quart container suits larger groups.
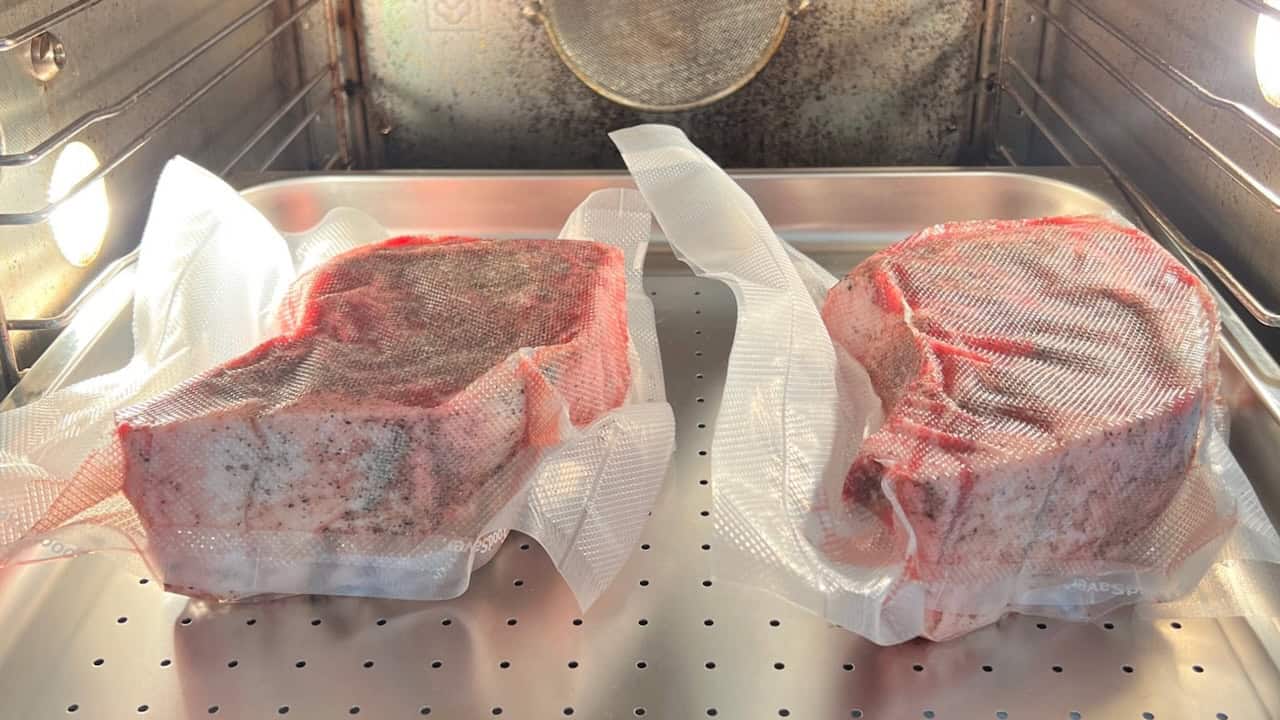
- Sealable bags (essential): Vacuum sealer bags, freezer Ziploc bags, or reusable Stasher bags. Remove as much air as possible so the bag stays submerged.
- Vacuum sealer (optional): Helpful for long cooks, but the water displacement method handles most home use scenarios.
- Binder clip or rack (optional): A binder clip secures the sous vide bag to the pot’s rim; a rack separates multiple bags for even circulation.
As Our Daily Brine’s sous vide setup guide notes, a water oven is another option, but most home cooks find an immersion circulator and stockpot the best way to start.
With the equipment sorted, the cooking process itself is refreshingly straightforward.
|
Set Your Water Bath Before You Season a Single Ingredient |
How to Cook Sous Vide Step by Step
Every sous vide cook follows the same sequence regardless of the protein. According to Anova’s step-by-step cooking guide, the entire cooking process breaks into four stages: season, seal, cook, and finish.
- Season generously: Salt, pepper, herbs, and a drizzle of olive oil go directly into the sous vide bag. The sealed environment keeps seasoning in contact with the food for the full cooking time.
- Seal and submerge: Place seasoned food in a vacuum-sealed bag or sealable bag with the air pressed out. Lower it into the preheated water bath, ensuring full submersion.
- Set and walk away: Confirm the cooking temperature on your sous vide device, set a timer, and leave. No stirring, no flipping, no checking.
- Finish with a sear: Remove the protein, pat dry, and sear in a very hot pan for 45–60 seconds per side. That quick sear creates the golden crust that completes the dish.
The beginner walkthrough from Mediocre Chef adds a useful hosting detail: if your sous vide time finishes before guests are ready, you can hold proteins at the set temperature for an extra 30–45 minutes with minimal texture change — a lifeline when cocktail hour runs long.
You can map your entire timeline inside The Gourmet Host app so sous vide start times align with your appetiser and side dish schedule.
Now that the sous vide method is clear, the question becomes what to cook first.
|
Save Your Best Sous Vide Recipes |
The Best Foods to Sous Vide for a Gathering
Not every ingredient benefits equally from sous vide cooking, but the ones that do are exactly what hosts serve. Tough cuts of meat — short ribs, pork shoulder, lamb shanks — transform after a long time in the water bath because low temperatures break down connective tissue without drying the outside of the meat.
For faster results, chicken breasts and pork chops are ideal first-time sous vide cooks. Serious Eats’ essential sous vide recipe guide calls chicken breast the best gateway protein because the difference versus traditional cooking methods is dramatic — you go from overcooked steak or rubbery poultry to a perfectly cooked, juicy result.
- Chicken breasts (150°F, 1–2 hrs): Juicy edge to edge. Season with lemon, herbs, and olive oil for a bright, crowd-pleasing protein.
- Pork chops (140°F, 1–2 hrs): Tender and slightly pink — a revelation for guests who associate pork with dryness.
- Steaks (130°F for medium-rare, 1–3 hrs): Cook a batch at a single time and sear individually before plating.
- Salmon (125°F, 45 min): Silky, melt-in-your-mouth texture. Sous vide salmon on a platter makes an elegant starter.
- Crème brûlée (176°F, 1 hr): Poured into canning jars and cooked in the same water bath as your protein — perfect results without an oven.
Weston Brands’ introduction to sous vide cooking provides a broader temperature guide and general guidelines. The takeaway: nearly every protein on your menu can cook sous vide, delivering consistent results whether you serve four or twelve.
Choosing the right protein is half the equation — the other half is building your cook around your guests’ arrival.
|
Build Your Gathering Menu With Sous Vide |
Timing Your Sous Vide Cook Around Your Guests
The real advantage of sous vide for hosts is decoupling cooking time from serving time. A perfectly cooked steak can wait in the bath at its set temperature while you pour drinks and have a real conversation. That flexibility separates a frantic dinner from a relaxed evening.
- Anchor to your serving time: Decide when the main hits plates. Subtract five minutes for searing, then subtract the minimum sous vide time for your protein.
- Build in a buffer: Start 30–60 minutes earlier. The holding window keeps food at the desired temperature without degrading, giving you breathing room if guests arrive late.
- Sear to order: When guests are seated, pull the bags, pat the meat cooks dry, and hit a very hot pan. The sear takes under two minutes and fills the room with an aroma that signals dinner is served.
The getting started guide from Sous Vide Tools reinforces this: because a constant temperature means food cannot overcook, you gain flexibility that traditional cooking methods do not offer.
Food safety is maintained as long as your cooking temperature stays above 130°F for proteins — vacuum-sealed food in a circulating bath poses no risk over extended sous vide time.
The first time you sous vide for a dinner party, the strangest part is having nothing to do in the final hour. Lean into it. Set the table, cue a playlist, or sit down with a glass of wine — your main course is already a great cook in progress.
Plan the full evening inside The Gourmet Host app and let the water bath handle the rest.
Frequently Asked Questions
Yes — especially for hosts. Sous vide cooking eliminates doneness guesswork and frees you from monitoring the stove during a gathering. The initial investment in a sous vide immersion circulator pays for itself the first time you serve a perfectly cooked steak without breaking a sweat in front of guests.
Absolutely. The water displacement method — placing food in a freezer Ziploc bag and slowly lowering it into water to press air out — works well for most home use. Reusable Stasher bags and canning jars are also good alternatives. A vacuum sealer helps for long cooks but is not required to get started.
Cooking times vary by protein and thickness. Chicken breasts typically take 1–2 hours, steaks 1–3 hours, and tough cuts of meat like short ribs 24–72 hours. The foolproof method is following a temperature guide from your circulator’s manufacturer and adding a 30-minute buffer for entertaining flexibility.
Yes, when proper food safety guidelines are followed. Cooking at or above 130°F (54.4°C) for the recommended sous vide time pasteurises the food. The key is maintaining a constant temperature throughout — exactly what a sous vide machine does. Never leave food in the danger zone (40°F–130°F) for extended periods.
Continue Reading:
More On Cooking Techniques
- 4 Advanced Methods & Techniques For Creative Home Cooking
- Cold Smoking vs Hot Smoking: Which Technique Is Right for You?
- Different Methods & Techniques For Cooking Like a Chef
- How to Flambé at Home: A Host’s Guide to Safe Flames
- How to Make Homemade Pasta: A Hands-On Hosting Skill
- The Best Hot Sauce Making Kits for a DIY Dinner Party Activity
- The Complete Cooking Techniques List for Confident Home Hosts
More from The Gourmet Host
- A History of Communal Dining Experiences (& How To Create Your Own)
- Fall Themed Dinner Party Ideas and Menus
- Cozy Non-Alcoholic Fall Drinks for Autumn Hosting
Explore TGH Categories