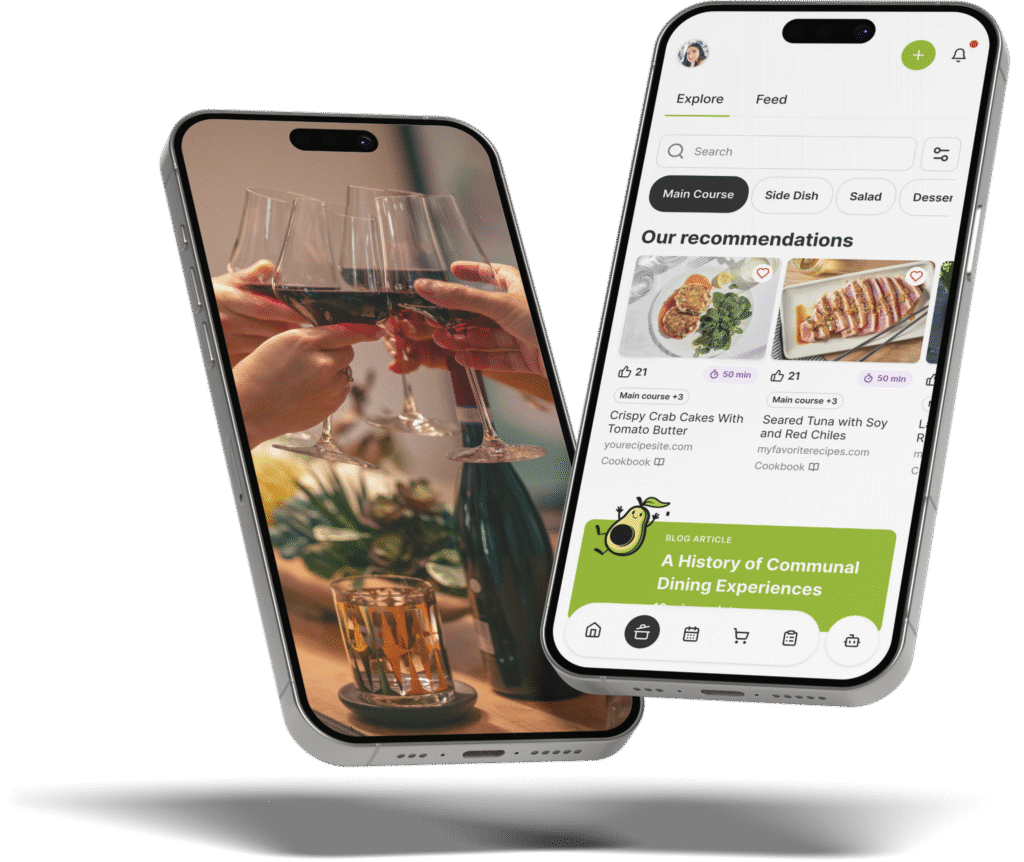
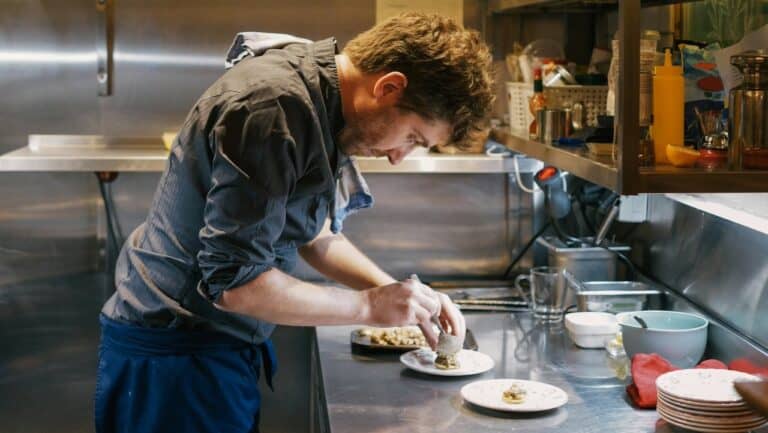
How to Set Up a DIY Mimosa Bar for Brunch and Showers
A single bottle of sparkling wine yields six to eight mimosas — enough for a small table of guests to pour their own drinks without you standing behind a makeshift bar all morning. That math alone makes the mimosa bar one of the most host-friendly drink stations you can build.
Yet many skip past the decisions that matter: which sparkling wine to buy without overspending, how many juice varieties actually keep guests interested, and where to place the whole setup so foot traffic doesn’t bottleneck around the food.
We walk you through every step of a mimosa bar setup — from champagne quantities and juice pairings to table flow and non-alcoholic options — so you can build the ultimate mimosa bar, step away from the station, and join the conversation with less stress and more sparkling wine in your own glass.
At a Glance
- One 750 ml bottle of sparkling wine makes six to eight mimosas, so plan one bottle for every two to three guests.
- Offer three to five juice options beyond orange juice — pineapple, grapefruit, pomegranate, and peach purée give guests variety without overwhelming the table.
- A dry brut sparkling wine between $10 and $15 balances sweetness from the juice and stays within a reasonable party budget.
- Place the mimosa station away from the food table so guests can pour at their own pace without blocking the buffet line.
- Include at least one non-alcoholic sparkling option — sparkling apple cider or a flavored seltzer — so every guest can participate.
- Fresh fruit garnishes like orange slices, frozen berries, and lemon wedges add color and a small burst of flavor to each glass.
What Is a Mimosa Bar?
A mimosa bar is a self-serve drink station where guests build their own bubbly cocktail by choosing from different juices, sparkling wines, and garnishes. Unlike a single-recipe cocktail served by the host, a mimosa bar turns drink-making into a hands-off, interactive experience — one that works for brunch gatherings, baby showers, bridal showers, and any special occasion worth celebrating. The setup shifts the host from bartender to guest, because once the bottles are chilled and the juices are poured into carafes, the station runs itself.
What Makes a DIY Mimosa Bar Worth the Setup
The classic mimosa — orange juice and champagne in a flute — has been a brunch staple for decades. A DIY mimosa bar takes that single recipe and opens it up, giving guests the freedom to mix their own combinations from a spread of fresh juices, garnishes, and sparkling options. The result is a drink station that handles itself while you plate the frittata.
What makes the format work from a hosting perspective is the ratio of effort to impact. You spend thirty minutes arranging bottles, carafes, and a few small bowls of garnish. Your guests spend the next two hours discovering combinations they wouldn’t have ordered from a menu.
In our experience hosting brunches with six to fifteen guests, a well-stocked mimosa bar generates more conversation than any signature cocktail we’ve mixed by hand.
- Self-serve pacing reduces your workload: Guests pour when they’re ready, not when you have a free hand. You refill a juice carafe once or twice — that’s it.
- Variety accommodates every palate: One guest prefers tart grapefruit juice with a dry cava. Another gravitates toward sweet peach purée with prosecco. The bar handles both without separate recipes.
- Visual appeal doubles as decor: A row of jewel-toned juices in glass carafes — deep ruby pomegranate, bright orange, pale gold pineapple — gives the table a centerpiece quality that flowers alone can’t match.
The real advantage is freedom. Once the ice bucket is full and the champagne bottles are chilled, you stop being the bartender and start being the host. That transition is the difference between a mimosa bar setup you dread and one you repeat at every gathering.
|
📲 Plan Your Mimosa Bar with Confidence |
Which Champagne Should You Actually Buy for Mimosas?
The most common mistake hosts make with a mimosa bar is overspending on the sparkling wine. A $40 bottle of vintage champagne from the Champagne region of France is wasted in a glass that’s half-filled with juice — the delicate flavor notes disappear behind the sweetness of the mixer. Instead, you want a dry or semi-dry sparkling wine in the $10 to $15 range that holds its bubbles and lets the juice flavors come through.
Three categories work well, and each brings a slightly different character to the glass:
- Brut cava: Spanish sparkling wine with crisp acidity and a clean, mineral finish. Cava is the workhorse of mimosa bars — affordable, widely available, and dry enough to balance sweet juices like mango and peach purée.
- Prosecco: Italian sparkling wine with softer, fruitier bubbles. Prosecco pairs especially well with citrus juices because its natural hint of pear and apple complements the tartness without competing.
- Domestic brut: American sparkling wines from California, Oregon, or Washington in the brut style offer excellent value and tend to have a slightly richer body, which works well when guests prefer a higher wine-to-juice ratio.
According to beverage experts at Feast + West, one 750 ml bottle of champagne or sparkling wine yields 6-8 mimosas. The rule of thumb for a group of ten guests over a two-hour brunch is five to six bottles — roughly two drinks per person with a comfortable buffer.
Adjust based on the number of guests: for a bridal shower mimosa bar with twenty people, double that estimate and add one extra bottle for the table that always pours generously.
Keep every bottle chilled until the moment it’s needed. An ice bucket on the station table holds the active bottle; a cooler or refrigerator stashes the backups. Warm sparkling wine loses carbonation faster, and flat mimosas are the quickest way to watch a drink station go quiet.
As Zola’s bridal shower entertaining guide notes, champagne stoppers extend the life of an open bottle by a full day — a worthwhile $5 investment if your gathering runs long.
One final note on the “best champagne for mimosas” question: the key ingredient in a great mimosa isn’t an expensive label — it’s a dry, well-chilled sparkling wine. If you do reach for brut champagne, treat it as a splurge for a special toast rather than the default pour. Fill the mimosa bar with honest, dry sparkling wine that plays well with juice.
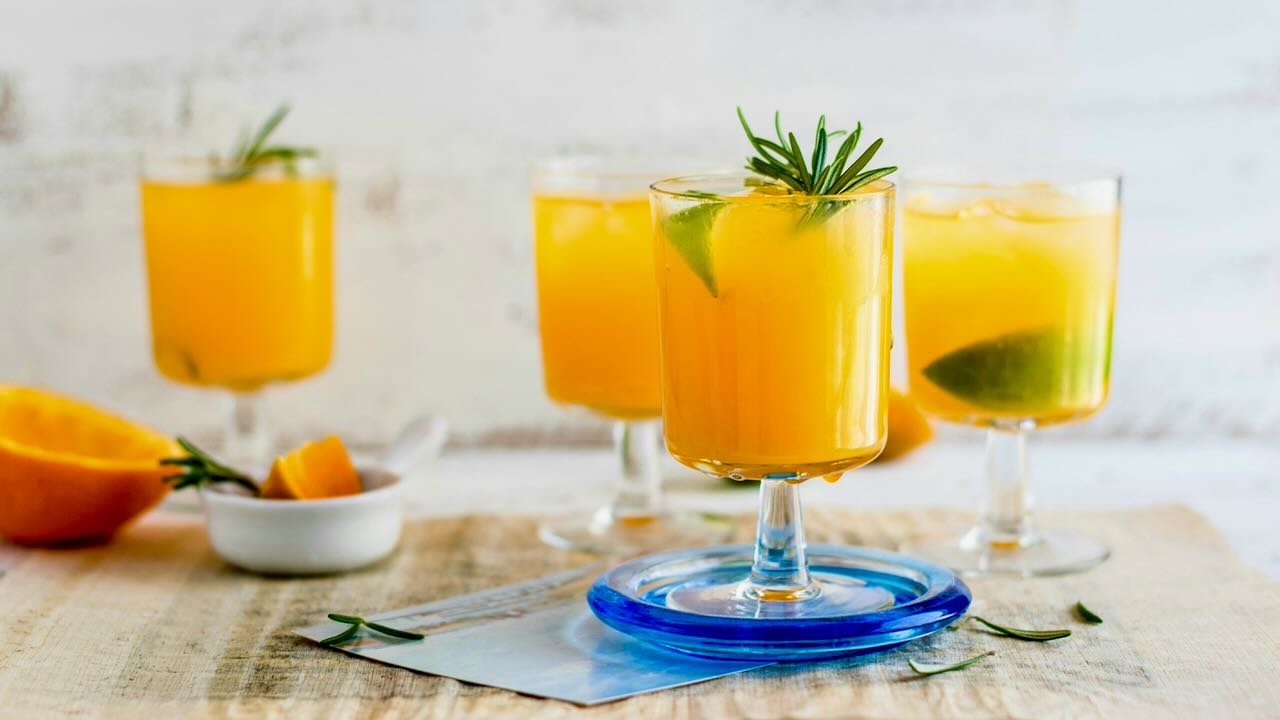
Juices, Garnishes, and the Lineup That Keeps Guests Pouring
Orange juice is the anchor of any mimosa bar, and you should have roughly twice the volume of orange juice as any other single option. But if orange juice is the only choice, you’ve built a one-note station that loses its novelty after the first glass.
Offering different juices — three to five options you can pick up at any grocery store — gives guests reasons to come back and pour juices they wouldn’t normally try, turning each glass into a delicious drink they mixed themselves.
Start with these juice categories, then scale up or down based on your guest list:
- Citrus (always include): Fresh-squeezed orange juice or a high-quality, pulp-free store-bought carton. Grapefruit juice adds a tart counterpoint that appeals to guests who prefer less sweetness.
- Tropical: Pineapple juice and mango juice bring bright, sweet flavors that pair well with drier sparkling wines. A small pitcher of peach purée lets guests build a Bellini-style drink without you making a separate recipe.
- Berry and stone fruit: Pomegranate juice adds a deep ruby color and a slightly tangy complexity. Grape juice — specifically white grape — offers a mild, crowd-friendly option that children and non-drinkers enjoy.
- Seasonal accents: Apple cider works for fall and holiday brunches. Cranberry juice bridges the gap between Thanksgiving and New Year’s. In summer, watermelon juice or a puréed strawberry blend keeps the spread feeling fresh.
Cook Nourish Bliss recommends labeling every carafe with small place cards or chalk markers on glass pitchers so guests don’t have to guess what they’re pouring. This small detail cuts down on hesitation and keeps the line moving.
For garnishes, think in three textures: sliced citrus (orange slices, lemon wedges), whole or frozen fruit (fresh berries, frozen raspberries that double as ice), and fresh herbs (a small bunch of mint or a few sprigs of rosemary). Arrange these in small bowls or ramekins beside the flutes.
Whitney Bond’s mimosa bar guide suggests cocktail picks for guests who want to skewer fruit without fishing it out of their glass.
SweetPhi’s recipe and garnish walkthrough adds one detail many guides miss: a small bowl of orange-flavored liqueur on the side for guests who want an extra splash of depth. It’s optional, but it signals to your more adventurous drinkers that this bar was set up by someone who thought of everything.
The lineup doesn’t need to be exhaustive. Five juice options, three garnish bowls, and clearly labeled carafes give guests plenty of room to experiment without turning your kitchen counter into a juice aisle.
|
📨 Fresh Mimosa Ideas, Delivered Weekly |
Setting Up the Station So You’re Not Stuck Behind It
Where you place the mimosa bar matters more than what you put on it. The number-one hosting mistake is positioning the drink station right next to the food — which creates a bottleneck where guests waiting to pour a drink block guests trying to reach the quiche.
Foodie Crush’s DIY mimosa bar guide recommends placing the drink station on a separate table, countertop, or bar cart in a different area of the room entirely.
Here’s a layout that works for most spaces:
- Choose a surface with counter space on both sides. Guests need room to set down their glass while they pour. A dining room sideboard, a kitchen island end, or a rolling bar cart all work.
- Arrange from left to right in pour order. Glasses on the far left, then sparkling wine bottles in the ice bucket, then juice carafes, then garnish bowls on the far right. This flow mirrors how guests naturally build a drink and prevents anyone from reaching over an open bottle.
- Keep backup bottles within arm’s reach but off the main surface. A small cooler or beverage tub beside the table holds extra champagne bottles and juice cartons. You or a helpful guest can swap in a fresh bottle without rearranging the entire spread.
Presentation matters, but functionality matters more. Smarty Had a Party’s styling guide emphasizes using clear glass carafes or small pitchers rather than opaque containers — the colors of the juices do the decorating for you. A mimosa bar sign propped behind the station or hung above it tells guests exactly what they’re looking at and invites them to help themselves.
For glassware, you have two practical options:
- Glass champagne flutes give the most elegant look and keep the bubbles concentrated. They work well for seated brunches with under fifteen guests.
- Disposable champagne flutes — specifically the clear plastic variety — are the realistic choice for baby showers, outdoor events, and large party gatherings where breakage is a concern. Bubbly Side of Life’s quantity guide recommends having two to three flutes per guest, since people tend to set glasses down and grab a fresh one.
The station should be ready at least fifteen minutes before the first guest arrives. Ice in the bucket, bottles uncorked or loosely re-corked, carafes filled, garnish bowls arranged. That buffer gives you time to step back and confirm everything is accessible — and it means you’re greeting guests at the door instead of slicing lemons.
|
Chill Your Sparkling Wine to 40°F — Not Just “Cold Enough” |
Mimosa Bars for Showers, Holidays, and Every Excuse in Between
A mimosa bar isn’t a one-occasion setup — it adapts to nearly every gathering where guests arrive hungry and ready to socialize. The juices change, the garnishes rotate, and the tone shifts, but the station format stays the same.
Once you’ve seen how a fun mimosa bar works at a Saturday brunch, you’ll start finding mimosa bar ideas for every event on your calendar — from a casual bubbly bar at a birthday to a polished station at a formal shower.
Bridal shower mimosa bar: This is where presentation gets the most attention. Charmed by Camille’s bridal shower guide suggests matching the juice colors to the wedding palette — blush peach purée and pale gold pineapple juice for a soft spring wedding, deep cranberry and pomegranate for a winter celebration.
Add a “build your own mimosa” card with the bride’s favorite combination listed at the top. A focal point like a floral arrangement or a framed sign with the couple’s names ties the bar to the event.
Baby showers: The Anthony Kitchen’s seasonal approach works well here — choose three to four juices that match the shower’s color scheme or nursery theme. Baby showers often run longer than brunches, so plan for three drinks per guest over three hours.
Include one sparkling non-alcoholic option prominently on the bar, not hidden at the end. Expecting mothers and guests who don’t drink deserve the same pour-your-own experience.
Holiday brunches: Mother’s Day, Easter, and New Year’s Day are all natural fits for a mimosa station. Swap in seasonal juices — cranberry and apple cider for winter, watermelon and fresh strawberry purée for summer.
First Day of Home’s budget-friendly mimosa bar guide recommends buying juices at warehouse stores and decanting into glass carafes to keep costs low without sacrificing the visual appeal of the spread.
- Mother’s Day brunch: Set out a small card with a handwritten note — “Mom pours first.” It’s a one-second detail that makes the guest of honor feel celebrated.
- Easter and spring gatherings: Pastel-toned juices (peach, white grape, light cranberry) and edible flower garnishes give the bar a seasonal feel.
- New Year’s Day recovery brunch: Swap one juice slot for a premixed Bloody Mary option so guests can choose their brunch drink style. Keep the mimosa bar focused on citrus and tropical flavors to contrast the savory alternative.
The non-alcoholic option deserves its own space on the station, not an afterthought for guests who don’t want much alcohol or any at all. Sparkling apple cider, a quality ginger ale, or a flavored sparkling water lets guests who don’t drink alcohol build their own “mockmosa” with the same juice and garnish options as everyone else.
In our years of hosting, we’ve found that labeling the non-alcoholic sparkling option clearly — rather than tucking it behind the champagne bottles — makes a visible difference in how included every guest feels.
|
📲 Keep Every Detail Organized — From Guest Count to Grocery Run |
How to Know Your Mimosa Bar Is Ready Before the First Guest Arrives
The final check before guests arrive isn’t about the juices or the garnishes — it’s about whether the station works without you. Walk up to your own mimosa bar as if you’ve never seen it. Can you tell which carafe is which? Can you reach a glass, pour the sparkling wine, add juice, and grab a garnish without shuffling anything out of the way?
If yes, you’ve built a perfect mimosa bar. If you have to move a bottle or lean over a bowl, rearrange before the doorbell rings.
Run through this quick list ten minutes before your first guest arrives:
- Glasses accessible and right-side up at the starting end of the station.
- Sparkling wine bottles chilled, in the ice bucket, with at least one bottle open or loosely corked for easy pouring.
- Juice carafes labeled and filled to roughly three-quarters capacity — leave room so the carafes don’t overflow when guests pour.
- Garnish bowls stocked with cocktail picks or small tongs beside them.
- Cocktail napkins and a small waste bowl at the far end for used picks, lemon seeds, and drips.
Even in a tight space — a galley kitchen or a small apartment counter — you can run a functional mimosa bar by using a narrow rolling cart and stacking glasses on a separate tray beside it.
The size of your party shapes one last decision: glassware quantity. For a seated brunch of eight, one flute per guest plus two extras covers you. For a large party of twenty or more, plan two to three disposable champagne flutes per person and stack extras in a visible spot so guests don’t hesitate to grab a fresh glass.
Plastic champagne flutes work perfectly well here — your guests came for the mimosas, not to admire the crystal.
One detail that separates a serviceable mimosa station from one guests photograph: a single fresh flower arrangement — low enough to see over — placed behind the carafes. It adds color, it marks the bar as intentional, and it costs less than one bottle of sparkling wine. Fresh flowers beside fresh fruit beside jewel-toned juices creates the kind of table that makes guests reach for their phone before they reach for a glass.
The moment you step back from the station and join the conversation is the moment the mimosa bar has done its job. You’ve set the table, built the spread, and handed the reins to your guests. Now pour one for yourself.
Frequently Asked Questions
Choose a surface away from the food, arrange glasses and sparkling wine on one end and juices and garnishes on the other, and label each carafe. Keep backup bottles in a cooler nearby. The station should flow left to right so guests can build their drink without reaching over open bottles.
Plan one 750 ml bottle of sparkling wine for every two to three guests at a two-hour event. Each bottle yields six to eight mimosas. For ten guests, five to six bottles provides a comfortable buffer. Buy one extra bottle beyond your estimate — it’s better to have a spare than to run dry mid-brunch.
Orange juice is the foundation — stock twice as much as any other option. Add three to four additional choices: pineapple juice, grapefruit juice, pomegranate juice, and peach purée cover a wide range of palates. Seasonal options like cranberry juice or apple cider work well for holiday gatherings.
Place the active bottle in an ice bucket filled with ice and water on the station table. Store backup bottles in the refrigerator or a separate beverage tub. Chill all bottles to 40°F at least three hours before the event. Champagne stoppers keep an opened bottle fizzy for up to a day if the gathering runs long.
Yes — replace the sparkling wine with sparkling apple cider, a quality ginger ale, or flavored sparkling water. Keep all the same juices and garnishes on the station so non-drinking guests have the identical pour-your-own experience. Label the non-alcoholic sparkling option clearly and place it alongside the wine, not behind it.
Light, savory dishes balance the sweetness of the drinks. A frittata, a charcuterie board with cured meats and soft cheeses, smoked salmon on toast points, and a mixed green salad all complement mimosas. Avoid heavy, rich dishes that compete with the bubbles — the food should be something guests can eat while standing and chatting.
Continue Reading:
More On Home Bar Entertaining
- Stock the Bar Party: A Host’s Complete Guide to Planning, Gifts, and Games
- Bar Signs for Home Bar: How to Choose Custom Pub Decor That Sets the Mood
- How to Set Up a Coffee Bar Your Guests Will Love
More from The Gourmet Host
- Best Brunch Cocktails Beyond the Mimosa
- Brunch Setup Ideas: Creative Table Setting Decor for Home
- Brunch Table Setting Ideas for Every Style
- Party Brunch Ideas That Impress Any Crowd
- Easy Brunch Ideas for a Relaxed Weekend
Explore TGH Categories