Party Decoration Ideas That Set the Scene
The difference between a party that feels thrown together and one that feels designed usually comes down to three things: a colour scheme that runs through every surface, lighting that shifts the energy of the room, and at least one focal point guests notice the moment they walk in.
Most hosts get stuck scrolling through product listings without a plan for how their decorations actually work together. That gap—between buying supplies and building an atmosphere—is where the real opportunity sits.
We’ve broken it down into six sections covering themes, balloon arches, table settings, DIY ideas, lighting, and a day-before assembly plan—so every decorative element you choose connects to a cohesive look your guests feel the second they arrive.
At a Glance
- Start every decoration plan with a defined color scheme and party theme before purchasing a single supply.
- Balloon arches and backdrops create a stunning focal point without requiring professional installation.
- Table settings and centrepieces anchor the dining experience and set the tone for the evening.
- DIY party decoration projects—from paper flowers to streamer walls—cut costs while adding personal touches.
- Fairy lights, custom neon signs, and warm white lights transform any party space after dark.
- A day-before timeline keeps assembly stress-free and ensures every detail lands in the right place.
What Are Party Decoration Ideas?
Party decoration ideas are the practical decisions that turn a bare room into a space your guests actually react to—where they pause at the entrance, comment on the table, or snap a photo of the backdrop before the evening even starts. For hosts juggling a budget, a timeline, and a vision that lives mostly on a Pinterest board, the real challenge is translating inspiration into a room that feels cohesive rather than cluttered. What separates strong party decorations from a pile of impulse purchases is a design approach: choosing a color palette first, then layering decorative elements—textiles, lighting, centrepieces—so they tell one story instead of competing for attention.
Theme-Based Decorations That Set a Cohesive Tone
A party theme does more than dictate what to buy—it eliminates what to skip. When you commit to a specific direction, every decision downstream becomes faster, from selecting themed tableware to choosing the right flowers.
The strongest themed parties start with a color palette of two to three colours, then extend that palette across every surface guests will see: the entrance, the table, the drink station, and any photo areas. A tropical luau, for instance, pairs deep greens and coral across paper lanterns, linen napkins, and a fresh fruits centrepiece—creating one unbroken visual line rather than a collection of isolated decorations.
Birthday themes deserve the same discipline. A birthday bash built around a single colour—say, dusty rose—feels intentional when the tissue paper pom-poms, confetti balloons, and cake toppers all pull from the same family.
Interior stylist Julia Savitsky of Life is a Party recommends limiting your supply list to items that serve double duty—decorations that function as both decor and activity stations keep the space dynamic without visual clutter.
The same principle applies to milestone events: a birthday celebration for a 40th looks more polished when every element connects back to one design thread. Classpop’s birthday decoration roundup is worth a look for birthday parties that need a quick colour-first planning approach.
If you’re decorating a rental space or a backyard, mapping your layout before buying prevents the common mistake of over-decorating one corner and leaving the rest bare.
- Anchor your scheme with a primary colour and one accent: this limits decision fatigue at the party supply store and keeps vibrant colors from clashing.
- Choose your party favors to match the theme: small details like coordinated bags or tags reinforce the cohesive look guests take home.
- Use a mood board to test combinations: snap photos of your party supplies side by side before committing to quantities.
A well-chosen theme with a unique design transforms a room into an experience that leaves a lasting impression—and it makes every other decorating decision in this article easier to execute.
|
📨 Hosting Ideas Delivered Weekly |
Balloon Arches and Backdrops Worth the Effort
A balloon arch is one of the fastest ways to create a stunning focal point at any gathering—and you don’t need to hire a professional to build one. The key is choosing a balloon palette that matches your color scheme and varying the sizes so the arch has texture rather than looking like a uniform wall of rubber.
DIY balloon garlands follow a simple formula: inflate a mix of 5-inch, 11-inch, and 16-inch balloons in three to four coordinating colours, thread them onto a decorating strip, and attach the strip to a wall, doorway, or table edge with command hooks. Layer in a few metallic balloons for depth.
The entire process takes under an hour once you have a pump.
For photo-ready backdrops, pair a balloon garland with a glittery backdrop panel or a streamer wall in a complementary colour.
Zanvis’s birthday decor guide walks through several combinations that scale from a baby shower to larger celebrations. If you’re going bigger, a freestanding arch frame lets you position the display away from walls, framing the dance floor or entrance.
- Build in batches: inflate and size-sort balloons the night before, then assemble the garland strip day-of to keep latex fresh.
- Add organic elements: tuck fresh flowers, eucalyptus sprigs, or tropical flowers between balloons for a textured, layered look.
- Go beyond the arch: a single cluster of oversized confetti balloons tied to a gift table or guest of honor chair creates impact with minimal effort.
The most common mistake with birthday party decorations ideas is over-inflating—slightly under-filled balloons hold their shape longer and create a more organic silhouette.
Once your focal point is built, the next question is what’s happening at the table—where guests actually spend most of the evening.
Table Settings and Centrepieces That Anchor the Room
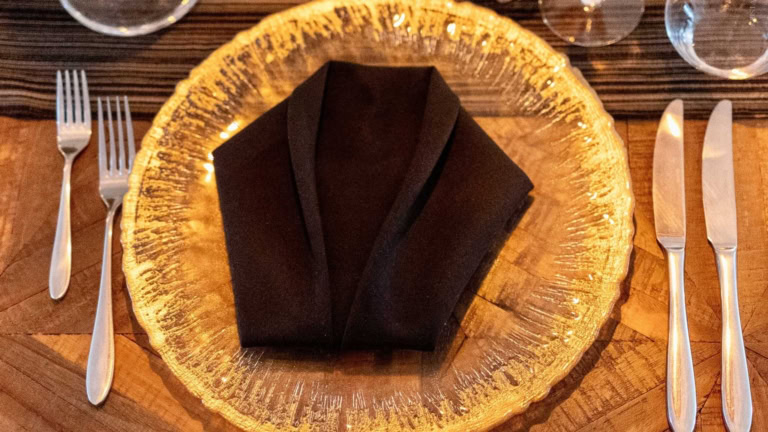
Your table settings do more than hold plates—they set the tone for the entire dinner. A well-styled table signals to guests that this evening was planned with intention, which shifts how they engage with the food, the conversation, and the space.
Start with a table runner or base layer that establishes your colour direction. From there, layer place settings with chargers, dinner plates, and napkins that either match or intentionally contrast your runner.
Place cards are an underrated detail—they give each guest a sense of belonging and allow you to manage seating dynamics, especially at a casual dinner party where people might otherwise cluster awkwardly.
For the centrepiece, height matters. Interior designer Camille Styles recommends keeping arrangements below sightline level so guests can see each other across the table—roughly 12 inches or shorter for a seated dinner. A cluster of mason jars holding fresh flowers in different colors works just as well as a single large arrangement, and it’s easier to move when platters or a birthday cake need space.
- Odd numbers win: group candles, vases, or small objects in sets of three or five for a natural, unforced arrangement.
- Layer textures: combine smooth ceramics, woven table runners, and organic flower petals scattered lightly for depth.
- Repeat one element down the table: a single stem in each place setting, or identical tea lights at every seat, creates visual rhythm.
In our experience hosting, the tables that get the most compliments are never the most expensive—they’re the ones where every element looks like it was chosen together.
Colour coordination matters more than individual price tags. If your dinner plates are white, pull colour from your napkins, your table runner, and one or two decorative elements like a vase or candle holder.
A happy birthday banner or small signage at the place setting can turn a regular dinner into a birthday bash without redecorating the entire room. The small details—a sprig of rosemary tucked into each napkin fold, a handwritten place card on textured card stock—are what transform a table from functional to intentional.
Strong table settings deserve strong lighting—but first, the decor pieces themselves don’t need to cost much.
|
🍽️ Plan Your Party Table in the App |
DIY Decor on a Budget
You don’t need a Party City run to fill a room with personality. Some of the most effective DIY party decoration projects use materials you already own—or can pick up for under ten dollars.
Paper flowers are one of the best-value projects for large-scale impact. A dozen oversized tissue paper blooms, pinned to a blank wall, creates a backdrop that rivals a professional installation.
Hobbycraft’s DIY party guide walks through several variations—from ruffled peonies to layered dahlias with intricate designs—using nothing more than tissue paper and floral wire.
The creative table setting ideas on our blog pair naturally with these kinds of handmade touches.
DIY photo booth setups are one of the most unique ways to double your decor as entertainment. Frame a corner with a streamer wall or hang paper lanterns at varying heights, add a basket of props, and you’ve created an interactive elements that keeps guests entertained between courses.
Amazing Architecture’s home party ideas include several affordable booth setups that work in both small apartments and larger spaces.
If you’re building a themed party from scratch, the Gourmet Host app can help you coordinate your menu around your decor theme—so the food and the setting tell the same story.
- DIY party hats: cut card stock into cones, wrap in patterned paper, and add ribbon ties for a playful touch that doubles as a favour.
- Mason jar luminaries: fill mason jars with battery-powered tea lights and a sprig of greenery for instant table warmth.
- Wall hangings on a budget: a simple branch draped with paper flowers or photos on twine creates a unique touch without nails or damage.
The right DIY pieces give a room warmth and character—but once the sun sets, lighting becomes the single biggest factor in how your party space actually feels.
|
One Supply Run Saves Three Hours of Party Prep |
Lighting and Ambience for Any Party Space
Lighting changes a room more than any other single decoration. The same space that feels flat under overhead fluorescents becomes intimate and inviting the moment you layer in softer sources—and you can do it for almost nothing.
Fairy lights are the workhorse of party ambience. Drape them along a mantle, weave them through a centrepiece, or use string lights along a fence line for an outdoor gathering. Warm white lights are almost always the right choice—cool white reads clinical, while warm tones mimic candlelight and make skin tones look better in photos.
Rangreli’s at-home decoration guide highlights how layering two or three light sources at different heights—a strand of fairy lights above, candles at table level, and a floor lantern in the corner—creates depth that a single source never can. This three-layer approach is a great way to make even a small room feel designed.
Custom neon signs have moved from nightclub territory into home entertaining. A special message like “Happy Birthday” or the guest of honor’s name in neon makes a statement backdrop for photo areas and serves as the anchor for a party scene that looks polished in every snapshot.
For outdoor gatherings, the right place to start is the perimeter. Line a fence or patio railing with warm white lights, then add a second layer of paper lanterns or mason jar luminaries along the walkway to the dining area. If you have a DIY decoration budget of under twenty dollars, a single strand of fairy lights draped overhead and a cluster of pillar candles on the table will outperform a dozen party supplies from a big-box store.
The goal is never more light—it is better light, placed where your guests naturally look.
- Dimmer switches pay for themselves: if your overhead lights don’t dim, replace the bulbs with smart bulbs you can control from your phone.
- Glow sticks in unexpected places: drop them into tall vases of water, float them in a pool, or scatter them on the dance floor for a festive touch after dark.
- Skip the overhead entirely: for evening gatherings, turn off ceiling lights and rely solely on fairy lights, candles, and accent lamps for the perfect atmosphere.
If you want to see how lighting and table settings interact, our ambience tips article covers the fundamentals in detail.
With your lighting plan in place, the final step is making sure all these elements come together smoothly—which means planning your setup sequence.
|
✨ Coordinate Decor, Menu, and Guest List in One Place |
How to Pull Every Detail Together the Day Before
The decorations are chosen, the supplies are bought, and the vision is clear—now the question is timing. The hosts who enjoy their own parties are the ones who finish setup before the first guest rings the doorbell, not the ones still taping streamers while people arrive.
A day-before assembly plan turns scattered tasks into a calm sequence. Start with the specific areas guests see first: the entrance, the main gathering room, and the dining table. Hang any wall hangings, position your balloon arch or backdrop, and set up your DIY photo booth frame so it’s ready for props the next day.
For hosts who like to plan visually, the Gourmet Host app’s planning tools let you map your dinner party from decor to dessert—so nothing gets forgotten in the final stretch.
Fun Play World’s DIY decoration guide suggests grouping tasks by tool: do all your cutting and folding in one session, all your taping and hanging in another. This is a great idea for any host—the batch approach eliminates the back-and-forth that slows most setups down.
- Night before: assemble centrepieces, inflate balloons (store in a bag with a little air to prevent deflating), pre-set table runners and place cards.
- Morning of: position the balloon arch, hang the backdrop, arrange fresh flowers (cut stems and place in water), test lighting.
- One hour before guests: light candles, turn on fairy lights, scatter any loose elements like flower petals or confetti, and walk the space as a guest would.
When the last candle is lit and the right decorations are in the right place, the overall experience shifts—and you get to be the host who actually enjoys the party.
The secret most newcomers to home entertaining miss is that decorations are not just visual—they shape how people move through a party space, where they gather, and how long they stay. A well-placed balloon arch draws guests toward the dance floor. A glowing table centrepiece anchors conversation.
Every DIY decoration you build serves a purpose beyond looking good.
For anyone planning a birthday celebration, seasonal gathering, or casual dinner party, the playful design choices you make with your decor are what guests remember long after the last plate is cleared.
If you’re looking for the complete planning checklist to pair with your decorating plan, we’ve built one that covers everything from the menu to the music—and our theme guide can help you lock in a direction before your next trip to the store.
Frequently Asked Questions
Good party decorations start with a defined color scheme and build outward from there. Balloon arches, fresh flowers, fairy lights, and themed tableware are reliable choices that scale from small dinner parties to large birthday celebrations. The key is choosing a cohesive palette so every element reinforces one visual direction.
Focus on high-impact, low-cost projects like tissue paper flowers, DIY balloon garlands, and streamer walls. Mason jars with battery-powered candles and a single stem create warm centrepieces for under five dollars each. Limiting your colour palette to two shades also reduces waste and makes everything look intentional.
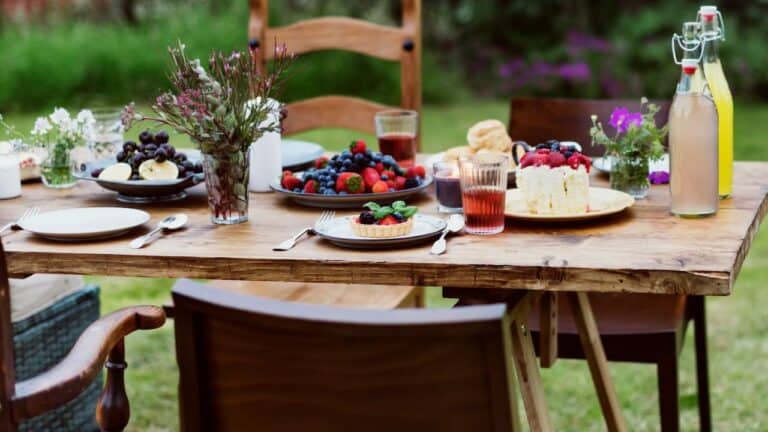
Pastel linens, fresh seasonal blooms, and light-toned ceramics define a spring table. Layer a linen runner with small bud vases holding tulips, ranunculus, or garden roses, and add soft candlelight for evening dinners. Keep arrangements low so conversation flows easily across the table.
Graduation centrepieces built around school colours feel personal and festive. Mason jars wrapped in ribbon, photo displays of the graduate, and DIY graduation cap toppers are popular options that guests notice. Adding fairy lights or a small floral accent brings polish without increasing the budget significantly.
Begin with a table runner or cloth that anchors your colour direction. Layer chargers, dinner plates, and folded napkins at each place setting, then add glassware and flatware. A low centrepiece and place cards complete the look. Keep sightlines clear so guests can see and talk to each other comfortably.
Paper lanterns, confetti-filled balloons, photo booth frames, and tissue paper pom-poms are among the easiest DIY decorations with the highest visual return. Most require only scissors, tape, and twenty minutes. Grouping several identical pieces together—like a cluster of lanterns—creates more impact than scattering single items around the room.
Continue Reading:
More On Party Decorations
- Centrepiece Ideas for Every Dining Room Table
- Dinner Decorations Ideas for Every Occasion
- Elegant Floral Arrangements for Your Dining Table
- Fall Table Centrepiece Ideas for Cozy Gatherings
- Graduation Party Centrepiece Ideas to Celebrate
- Spring Table Decor Ideas That Feel Fresh
More from The Gourmet Host
- How to Host a Dinner Party Your Friends Will Love
- 3 Easy Ambience Tips For The Perfect Dinner Party Mood
- 7 Creative Table Setting Ideas For Your Next Dinner Party
- The Ultimate Dinner Party Planning Checklist (Time-Stamped)
Explore TGH Categories